Sourdough Focaccia Recipe (Crispy, Pillowy, Same-Day or Overnight)
If you have been baking sourdough for any amount of time and have not made focaccia yet, this post is going to change your week. Possibly your life. I am not being dramatic.
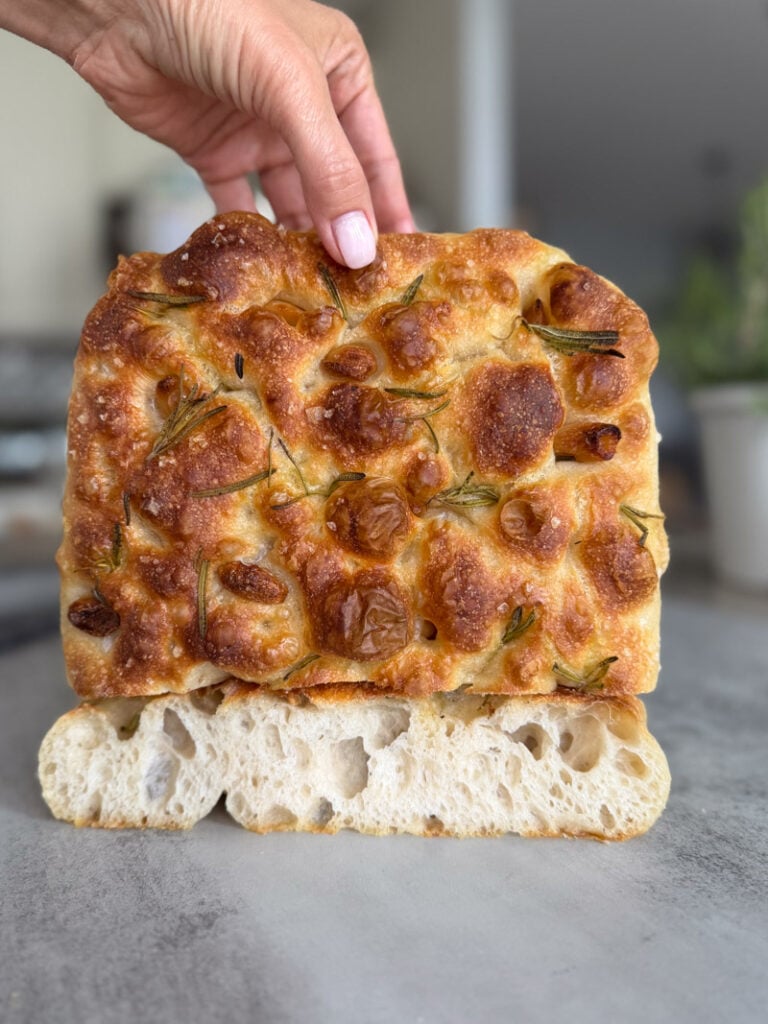
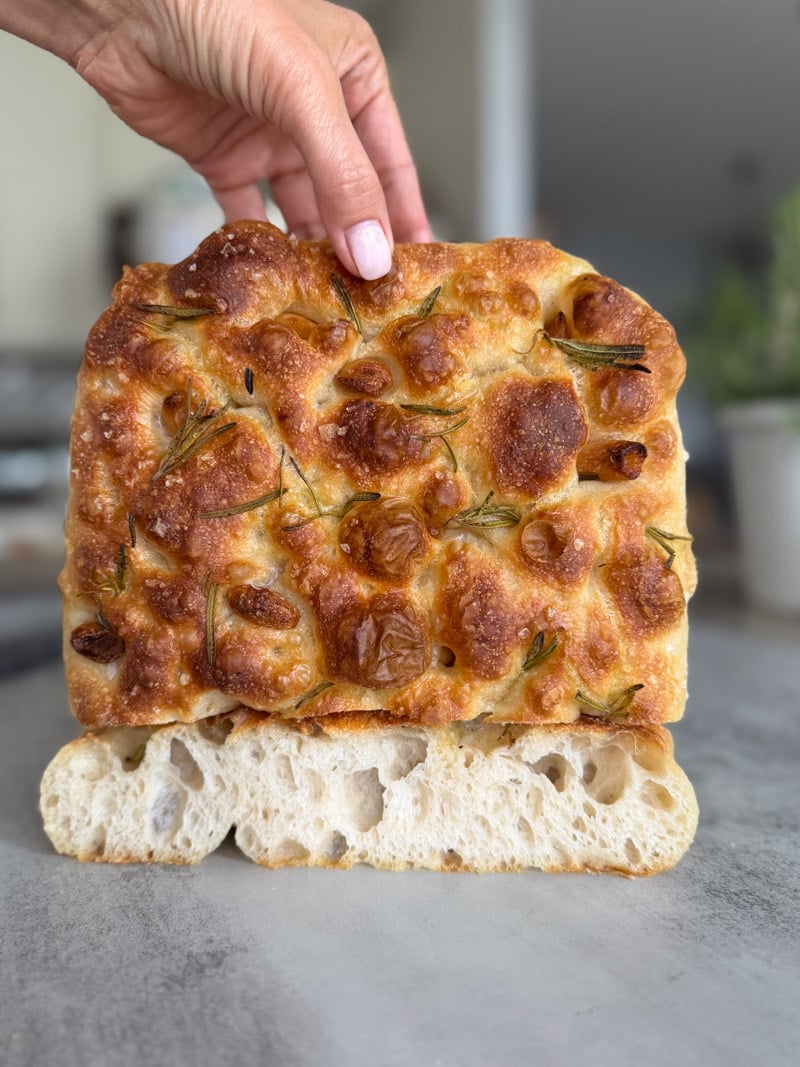
Focaccia is the most forgiving sourdough bake in existence. No banneton. No Dutch oven. No lame, no scoring, no shaping anxiety. You mix the dough, do your coil folds, put it in a well-oiled pan, let it do its thing, dimple it with your fingers, add your toppings, and bake it. The result is a thick, pillowy, golden-bottomed slab of bread with a crispy exterior and a soft, airy, olive-oil-drenched interior that smells like a bakery in Rome.
It is also, I will argue, the perfect sourdough bake for a beginner who has just finished their first plain loaf and wants to try something that feels exciting without adding complexity. And for the experienced baker it is the most flexible canvas imaginable — savory, sweet, deep dish pizza, loaded sandwich bread. It does everything.
What Is Sourdough Focaccia?
Focaccia is an Italian pan bread, and this is the sourdough version: a high-hydration dough leavened entirely by your starter, or with the addition of instant yeast if using discard. It bakes in a well-oiled pan, gets dimpled deeply with your fingertips, and comes out with a crisp, almost fried bottom and a soft, open interior.
What makes this version different is the way the dough comes together. The flour and water rest first on their own (an autolyse), then the starter and salt go in, and only after that does the olive oil join the party. Building the dough in stages gives you a smoother, stronger dough and better structure for those big bubbles. And you get to choose your own timeline: bake it the same day, or tuck it in the fridge overnight for a deeper, tangier flavor.
You’ve probably heard the old advice that if your sourdough overproofs, you can just turn it into focaccia and call it saved. A lot of bakers have tried that rescue mission and ended up with something tough and underwhelming instead. That’s not what’s happening here. This recipe is built to be focaccia from the start, at a much higher hydration than a rescued loaf ever has, and that hydration is exactly what gives you the open, pillowy crumb this bread is known for.
This dough also gives you a choice in how you bake it, depending on the kind of focaccia you’re in the mood for. Bake it in a 9×12 pan and you get a deep, pillowy, soft focaccia, the kind that’s perfect for soaking up sauce or splitting into a sandwich. Stretch that same dough out on a rimmed cookie sheet or a baking steel instead, and you’ll get a thinner focaccia with an extra-crispy exterior and a soft, chewy interior. Same dough, same technique, two very different textures depending on what you’re craving.
Why You’ll Love It
- A crackly, golden, olive-oil-crisp bottom with a soft, pillowy crumb on top. The contrast is the whole point.
- Genuinely beginner-friendly. No shaping, no scoring, no Dutch oven, no steam.
- You choose the timeline. Same-day or overnight cold ferment, whichever fits your week.
- A blank canvas. Rosemary and sea salt one night, deep dish pizza the next, and a dessert version when you’re feeling wild.
- Makes one 9×12 pan, serving 8 to 10. It’s a crowd-pleaser and simple to share.
- It freezes well, so a second batch of slices is never a bad idea.
Ingredient Breakdown
Bread flour: 450g (about 3¾ cups) Bread flour brings the protein that gives focaccia its chew and helps the dough hold its structure under all that oil and all those bubbles.
Water: 370g (about 1½ cups plus 1 Tbsp) This is a high-hydration dough, so expect it to feel sticky and slack. That wetness is what opens up the crumb. Resist the urge to add more flour. Trust the process.
Active, peaked starter: 115g (about ½ cup) Your starter is doing all the leavening here, so it needs to be strong and fully peaked. That means the dome has leveled off and the surface is dimpled with lots of little craters. Don’t have a starter yet? Grab my free e-book >> Sourdough Starter from scratch in 7 days. Or start with my established starter Phoebe, my 170-year-old dehydrated starter.
Fine, non-iodized salt: 10g (about 1¾ teaspoons) Weigh this one. Fine salts vary from brand to brand, so grams are far more reliable than a spoon.
Olive oil: 10g (about 2 teaspoons) for the dough, plus plenty more for the pan and the topping Good olive oil is a flavor ingredient here, not just a fat, so use one you’d happily dip bread in. Oil in the pan is what fries the bottom crisp, and oil on top is what makes the surface glossy and golden. The rule in my kitchen: more than you think you need.
Instant yeast — ¼ tsp (optional) Not required, but a small amount speeds this dough along considerably. It’s especially handy in cold-weather months when a room-temperature rise can drag on, or if you want to use unfed discard instead of an active, peaked starter. More on this below.
Parchment paper Lining the pan makes the finished focaccia simple to lift out and catches any oil or topping that bubbles over.
Step-by-Step Directions
1. Feed Your Starter the Night Before
If your sourdough starter is maintained weekly, feed your starter in the evening: 25g starter, 50g warm water (85–90°F), and 50g flour (1:2:2 feeding ratio). Mix it well and check the consistency. It should be thick, like hummus, so add a little more flour if it’s too loose. Cover loosely and leave it at room temperature overnight to come to peak.
You want to walk into the kitchen the next morning to a strong, fully peaked starter, with a leveled dome and craters dimpling the surface.
💡 Pro Tip: Note on feeding ratios: let the season guide you: a 1:2:2 overnight feed works well in colder months, while 1:3:3 is better suited to a warm kitchen or summer baking, since warmth speeds fermentation along on its own. If you live in hot, tropical climates, you may need to up your ratio for an overnight feed. Only you know how your starter behaves in your environment.
Want an even stronger starter? This dough is high hydration, which asks a lot of your starter. If you’re going the straight sourdough route with no instant yeast, I recommend a two-feed strengthening method instead of a single overnight feed. It isn’t required, but it noticeably improves how your starter performs in a wet dough like this one. The morning before you plan to mix, feed your starter at a 1:1:1 ratio and let it peak. Once it does, feed it again at 1:4:4 and let it peak overnight, ready to use the next morning.
For example: Friday late morning feed your starter a 1:1:1 ratio (20g starter, 20g water, 20g flour), allow it to come to peak, depending on temperature, this can take anywhere from 4-7 hours. Once it is truly at peak, grab a different jar and place 13g of this starter into it along with 52g water and 52g flour, leave this newly fed starter in room temp to peak, this is a 1:4:4 feeding ratio and can take anywhere from 10-16 hours to peak. Saturday morning when your starter is at peak, mix your dough.
If you’re adding the instant yeast (see the note below), you can skip this extra feeding step entirely — the instant yeast is doing that strengthening work for you.
2. Autolyse the Flour and Water
Combine 370g water and 450g bread flour in a large bowl (no starter or salt yet) and mix until every bit of flour is hydrated and there are no dry patches. Cover and let it rest for 1 to 2 hours. Don’t add the starter or the salt yet. This rest lets the flour drink up the water on its own, which makes the dough smoother and stronger with less work from you.
3. Add the Starter and Salt
Add the 115g of peaked starter and 10g of salt to the rested dough. Mix and knead it in until fully incorporated. At first the dough will look shaggy and seem like it’s falling apart, and then it pulls together into one cohesive mass. It will not look as smooth, but as long as the starter and salt are well incorporated, cover and let it rest for 30 minutes.
💡 Pro Tip: If it’s cold-weather season and a room-temperature rise is dragging on longer than normal, or if you want to bake this with unfed sourdough discard instead of an active, peaked starter, mix in ¼ tsp of instant yeast along with your starter. It gives the dough a boost so you can still get dinner on the table, without shortchanging the soft, bubbly, airy interior this focaccia is known for.
4. Add the Olive Oil
Add the 10g of olive oil and work it in until the dough feels smooth and slightly tacky. Just keep working the dough by folding squishing the dough, working the oil in. Cover and rest another 30 minutes.
⚠️ Watch Out: The dough will slip and slide around as the oil goes in. That’s normal. Keep mixing until it comes back together instead of adding flour.
5. Coil Folds
Do 4 sets of gentle coil folds, 30 minutes apart. With wet hands, scoop under the center of the dough, lift it up until the ends release and tuck under themselves, then rotate the bowl a quarter turn and repeat. The dough stretches and coils onto itself, building strength gently without tearing those delicate gas bubbles.
After the final set, transfer the dough into a parchment lined and well-oiled pan. For a deep dish, pillowy focaccia, use a 9×12 deep baking dish lined with parchment and press the dough gently toward the edges — it won’t reach the corners yet, and that’s fine. If you’re after a thinner, extra-crispy focaccia instead, stretch the dough out on a well-oiled, parchment-lined rimmed cookie sheet gently, leaving it a little short of the full pan size so it has room to spread during the rise.
6. Bulk Fermentation: Choose Your Timeline
This is the step that makes or breaks your focaccia, so trust the dough, not the clock.
- Same-day option: Cover the pan and let the dough ferment in a warm spot until it has more than doubled in size. Depending on your kitchen, that can take well into the evening. Don’t rush it.
- Cold ferment option (for deeper flavor and longer fermentation): After placing the dough in the pan, cover it and let it rest at room temperature for 2 hours, then refrigerate overnight. The next morning, take it out and let it come up and double at room temperature before you go on. This adds one day, but the flavor is noticeably more complex and tangy.
For a shaped loaf, I teach a percentage rise that depends on dough temperature: around 75–80% in a warm kitchen (dough above 75°F) and up to 100% or more when it’s cooler (dough below 70°F). Focaccia is a different animal. There’s no shaping to hold it up, and we want big open bubbles, so we let it go further, to more than double. Dough temperature still decides how long that takes, which is why I’ll say it again: watch the dough.
7. Preheat, Oil, and Dimple
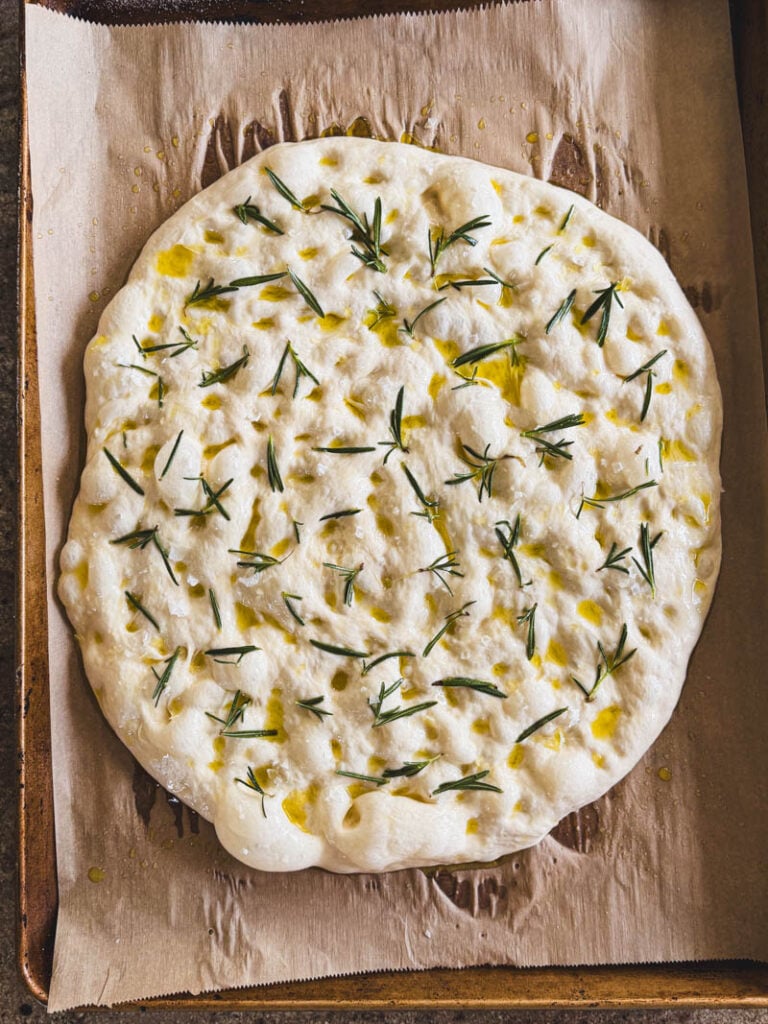
Preheat your oven to 450°F. When the dough has doubled, drizzle a generous amount of olive oil over the entire surface, more than feels reasonable. Then dimple deeply with your fingertips, pressing all the way to the bottom of the pan. The dimples hold pools of oil and keep the dough from puffing into one big dome. Add your toppings now.
8. Bake
Bake at 450°F for 25 to 30 minutes, until the top is deeply golden and the edges pull away from the sides of the pan. Lift a corner to peek at the bottom. It should be golden and crisp. For a final check, a probe thermometer in the center should read 198–205°F. Toppings-heavy focaccia often needs the full time, so don’t pull it early because the top looks pretty. If you stretched your dough thin on a sheet pan, start checking closer to the 18 to 20 minute mark instead — a thinner focaccia bakes through faster and can go from crisp to overdone quickly.
💡 Pro Tip: If baking on a baking steel, 10 min before your focaccia is baked, remove from the pan it is baking in by lifting the parchment corners and place directly on the hot baking steel and bake for another 5-10 min to crisp up the bottom
Let it rest in the pan for 10 minutes, then move it to a wire rack removing the parchment paper (this helps the focaccia cool with the bottom crust staying crispy not soggy). Wait at least 15 minutes before cutting. I know that’s the hardest part, but the crumb is still setting, and a too-early cut will make it taste gummy.
Topping Ideas: Savory, Cheesy, Deep Dish, and Sweet
Focaccia is a canvas. Here’s how I think about it.
Classic savory
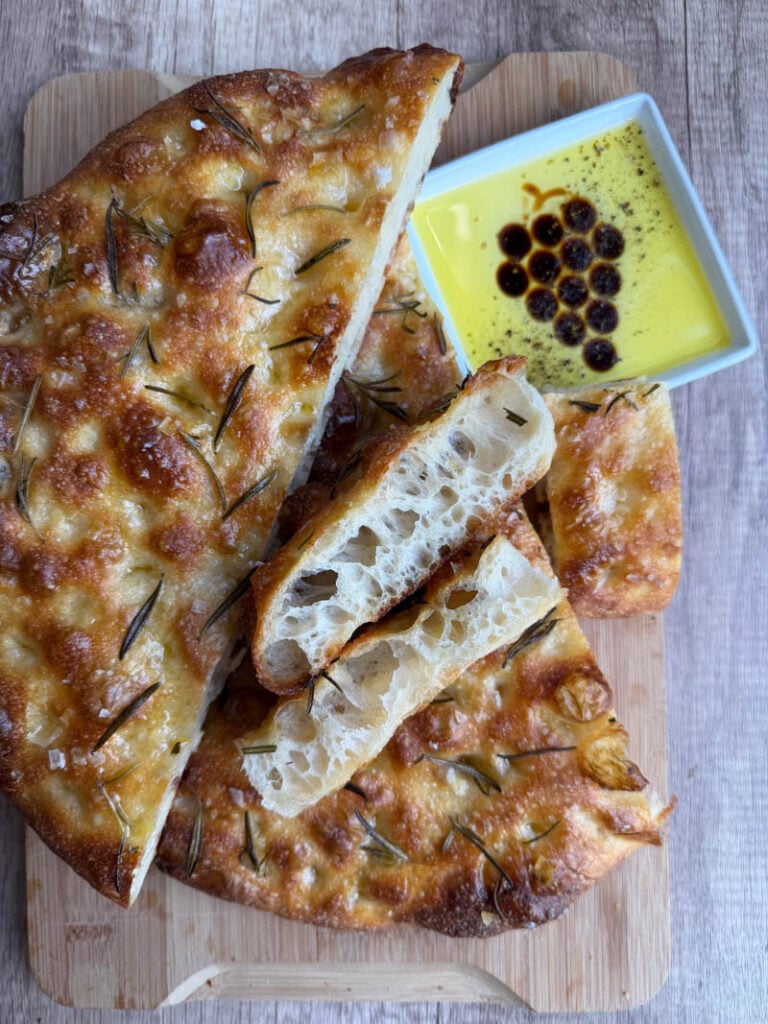
- Flaky sea salt and fresh rosemary. The original and still the best. Drizzle olive oil over the rosemary in a small bowl and mix it so all the rosemary is drenched in oil. Oilied rosemary doesn’t dry out and blacken in the oven when it bakes.
- Cherry tomatoes, roasted garlic cloves, and fresh thyme. Press the tomatoes into the dimples. They burst and caramelize as it bakes.
- Thinly sliced red onion, kalamata olives, and crumbled feta. Press everything in after dimpling so it bakes into the surface.
- Caramelized onions spread across the top before baking. Their sweetness against the salty, oily crust is extraordinary.
Cheese-forward
- Parmesan and italian seasoning across the top for the last 10 minutes of baking, for a salty, crispy cheese crust.
- Ricotta dolloped into the dimples before baking, finished with honey, red pepper flakes, and fresh thyme when it comes out of the oven.
💡 Pro Tip: For any shredded cheese, buy a block and shred it yourself. Bagged pre-shredded cheese is coated to keep it from clumping, and it doesn’t melt or crisp the same way.
Deep dish pizza Use the focaccia dough as your base. After dimpling, add a thin layer of crushed San Marzano tomatoes and tear fresh mozzarella across the top, then finish with fresh basil after it bakes. The thick, pillowy crust is unlike any pizza you’ve made before.
Sweet focaccia
- Fresh figs, honey, and crumbled gorgonzola. Sweet, salty, and complex.
- Sliced peaches or nectarines pressed into the dimples with brown sugar and a pinch of sea salt. Summer in a pan.
- Nutella swirled over the top after baking, finished with crushed hazelnuts. A dessert focaccia that needs no apology.
Sourdough Tools You’ll Want on Hand
- 9×12 deep baking dish: For the classic deep dish, pillowy version. A rimmed cookie sheet or baking steel works instead if you’re after the thinner, extra-crispy style.
- Parchment paper: For lining the pan and lifting the focaccia out cleanly.
- Digital kitchen scale: Every ingredient here is measured by weight, and it makes a real difference with a wet dough.
- Wire rack: Letting the focaccia cool on a rack keeps that crisp bottom from steaming soft.
- Oil and balsamic dipping dish: Half the fun of a good focaccia is tearing off a piece and dragging it through good olive oil and balsamic at the table.
How to Store & Freeze Sourdough Focaccia
Room temperature: Focaccia is best the day it’s baked. Store leftovers in an airtight container at room temperature for up to 2 days. To bring back the crispy exterior, reheat in a 375°F oven for 8 to 10 minutes.
Refrigerator: I don’t recommend the fridge for plain focaccia, because cold storage dries out and stales bread faster. The exception is a focaccia loaded with perishable toppings like ricotta or lots of cheese. Refrigerate those, and reheat the same way in the oven.
Freezer: Focaccia freezes beautifully. Slice it, wrap the pieces individually, and freeze for up to one month. Let the slices thaw at room temperature, then re-crisp in a 375°F oven.
Troubleshooting Your Sourdough Focaccia
Problem: My focaccia is dense with few bubbles. Why it happened: Usually it went into the oven underproofed, or the starter wasn’t fully peaked when it went into the dough. How to fix it: Give the dough all the time it needs to more than double, going by how it looks and not by the clock. And check your starter the next time: it should have a leveled dome and craters dimpling the surface before you start mixing.
Problem: The bottom is pale and soft, not crispy. Why it happened: There wasn’t enough oil in the pan, or it didn’t bake long enough. How to fix it: Oil the pan and the parchment generously, then lift a corner at the end of the bake to check. The bottom should be golden, and the edges should be pulling away from the pan.
Problem: The center is gummy even though it looks done. Why it happened: Either it was cut too soon, or the middle simply wasn’t finished baking. How to fix it: Check that the center reaches 198–205°F, and let the focaccia rest 10 minutes in the pan plus at least 15 minutes on a rack before slicing.
Problem: The dough is so sticky I can’t handle it. Why it happened: This is a high-hydration dough, and a sticky dough is the correct dough. How to fix it: Wet your hands before every fold instead of adding flour. Flour will change the recipe’s hydration and give you a tighter crumb.
Problem: The dough doesn’t reach the corners of the pan. Why it happened: It’s cold and tight right after the coil folds, and it hasn’t relaxed yet. How to fix it: Don’t fight it. Press it gently toward the edges and let the long rise do the work. It will spread and fill the pan as it proofs.
Frequently Asked Questions
How long does sourdough focaccia take from start to finish? Plan on the overnight starter feed, then roughly 4 to 5 hours of autolyse, mixing, resting, and coil folds before the dough goes into the pan. The same-day option then ferments until doubled, often into the evening. The cold ferment option adds one day but is worth it when you have the time.
Can I use sourdough discard instead of active starter? Yes, with one adjustment. Since discard is unfed and won’t leaven the dough on its own, mix in ¼ tsp of instant yeast along with the discard in Step 3 to give it the lift an active, peaked starter would normally provide.
Do I need a Dutch oven or a baking stone? No. Focaccia bakes right in its pan at 450°F, with no steam and no preheated vessel. It’s one of the most forgiving ways to bake with sourdough.
Can I use all-purpose flour instead of bread flour? You can, but expect a slightly softer, less chewy crumb, and the dough may feel wetter to handle. Bread flour gives the best structure for those big bubbles.
Can I bake it in a different size pan? This recipe is written for a 9×12 deep baking dish. A larger pan will give you a thinner focaccia that bakes faster, so rely on the visual cues (deep golden top, edges pulling away, crisp bottom) and the 198–205°F internal temperature, not just the timer.
Have You Tried These Yet?
If you love this focaccia, these are next on my list for you:
- The Best Italian Herb and Garlic Parmesan Sourdough Bread: the same cozy Italian flavors, baked as a loaf.
- The Foolproof Sourdough Bread Recipe: a great next step if focaccia was your first bake.
- The Best Sourdough English Muffins You’ll Ever Eat: another beginner-friendly bake with those famous nooks and crannies.
- The Best Sourdough Discard Crackers: Thin, Crispy and No Flour: perfect for dunking in soup alongside your focaccia.
- Same-Day Sourdough Pumpkin Pull-Apart Cinnamon Loaf: for when the fall weather turns and you want something sweet.
Sourdough Focaccia Recipe (Crispy, Pillowy, Same-Day or Overnight)
Ingredients
Method
- If your sourdough starter is maintained weekly, feed your starter in the evening: 25g starter, 50g warm water (85–90°F), and 50g flour (1:2:2 feeding ratio). Mix it well. Cover loosely and leave it at room temperature overnight to come to peak.
- Want an even stronger starter? If you’re going the straight sourdough route with no instant yeast, I recommend a two-feed strengthening method instead of a single overnight feed. It isn’t required, but it noticeably improves how your starter performs in a wet dough like this one. The morning before you plan to mix, feed your starter at a 1:1:1 ratio and let it peak. Once it does, feed it again at 1:4:4 and let it peak overnight, ready to use the next morning.For example: Friday late morning feed your starter a 1:1:1 ratio (20g starter, 20g water, 20g flour), allow it to come to peak, depending on temperature, this can take anywhere from 4-7 hours. Once it is truly at peak, grab a different jar and place 13g of this starter into it along with 52g water and 52g flour, leave this newly fed starter in room temp to peak, this is a 1:4:4 feeding ratio and can take anywhere from 10-16 hours to peak. Saturday morning when your starter is at peak, mix your dough.If you’re adding the instant yeast (see the note below), you can skip this extra feeding step entirely — the instant yeast is doing that strengthening work for you.
- Combine 370g water and 450g bread flour in a large bowl (no starter or salt yet) and mix until every bit of flour is hydrated and there are no dry patches. Cover and let it rest for 1 to 2 hours.
- Add the 115g of peaked starter and 10g of salt to the rested dough (if adding instant yeast for slightly faster rise especially in cooler temperatures or if using discard instead of active starter, add the instant yeast in this step as well). Mix and knead it in until fully incorporated. At first the dough will look shaggy and seem like it’s falling apart, and then it pulls together into one cohesive mass. Cover and let it rest for 30 minutes.
- Add the 10g of olive oil and work it in until the dough feels smooth and slightly tacky. Cover and rest another 30 minutes.
- Do 4 sets of gentle coil folds, 30 minutes apart. With wet hands, scoop under the center of the dough, lift it up until the ends release and tuck under themselves, then rotate the bowl a quarter turn and repeat. After the final set, transfer the dough into a parchment lined and well-oiled pan. For a deep dish, pillowy focaccia, use a 9×12 deep baking dish lined with parchment and press the dough gently toward the edges — it won’t reach the corners yet, and that’s fine. If you’re after a thinner, extra-crispy focaccia instead, stretch the dough out on a well-oiled, parchment-lined rimmed cookie sheet gently, leaving it a little short of the full pan size so it has room to spread during the rise.
- Same-day option: Cover the pan and let the dough ferment in a warm spot until it has more than doubled in size. Depending on your kitchen, that can take well into the evening. Don’t rush it. Cold ferment option (for deeper flavor and longer fermentation): After placing the dough in the pan, cover it and let it rest at room temperature for 2 hours, then refrigerate overnight. The next morning, take it out and let it come up and double at room temperature before you go on. This adds one day, but the flavor is noticeably more complex and tangy.
- Preheat your oven to 450°F. When the dough has doubled, drizzle a generous amount of olive oil over the entire surface, more than feels reasonable. Then dimple deeply with your fingertips, pressing all the way to the bottom of the pan. The dimples hold pools of oil and keep the dough from puffing into one big dome. Add your toppings now.
- Bake at 450°F for 25 to 30 minutes, until the top is deeply golden and the edges pull away from the sides of the pan. Lift a corner to peek at the bottom. It should be golden and crisp. Toppings-heavy focaccia often needs the full time, so don’t pull it early because the top looks pretty. If you stretched your dough thin on a sheet pan, start checking closer to the 18 to 20 minute mark instead — a thinner focaccia bakes through faster and can go from crisp to overdone quickly.Let it rest in the pan for 10 minutes, then move it to a wire rack removing the parchment paper (this prevents the bottom from getting soggy). Wait at least 15 minutes before cutting.
Notes
- Sourdough Starter feeding ratios: let the season guide you: a 1:2:2 overnight feed works well in colder months, while 1:3:3 is better suited to a warm kitchen or summer baking, since warmth speeds fermentation along on its own. If you live in hot, tropical climates, you may need to up your ratio for an overnight feed.
