The Best Sourdough English Muffins You’ll Ever Eat
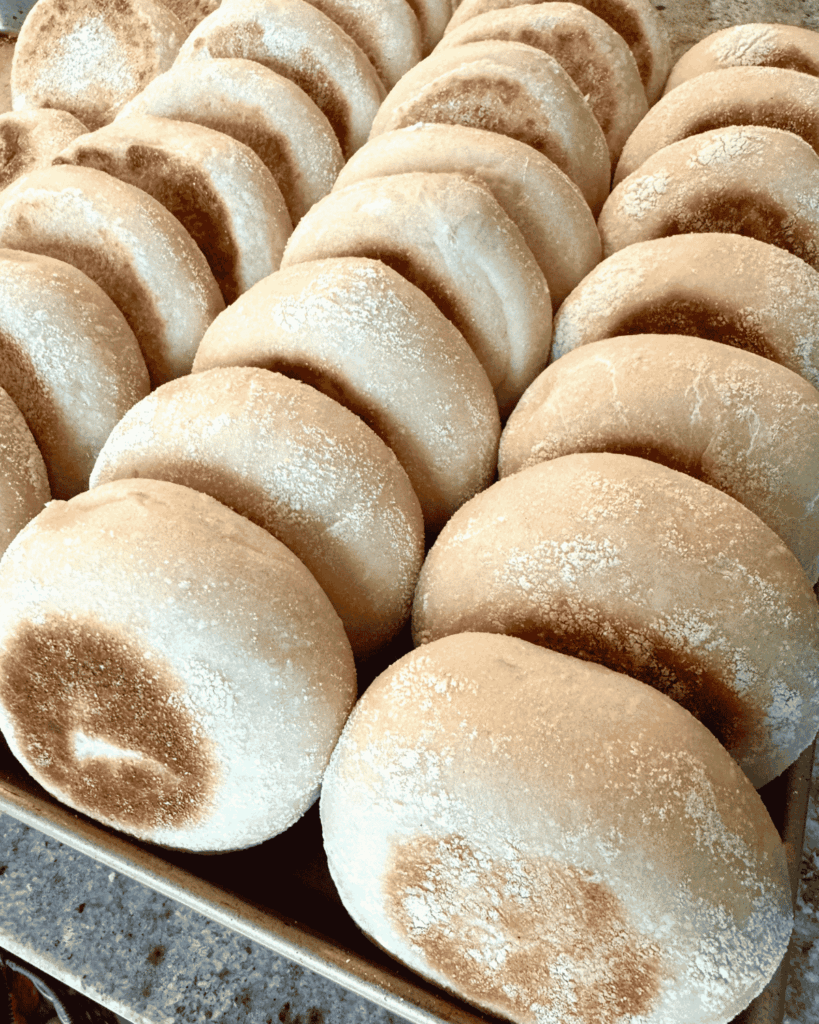
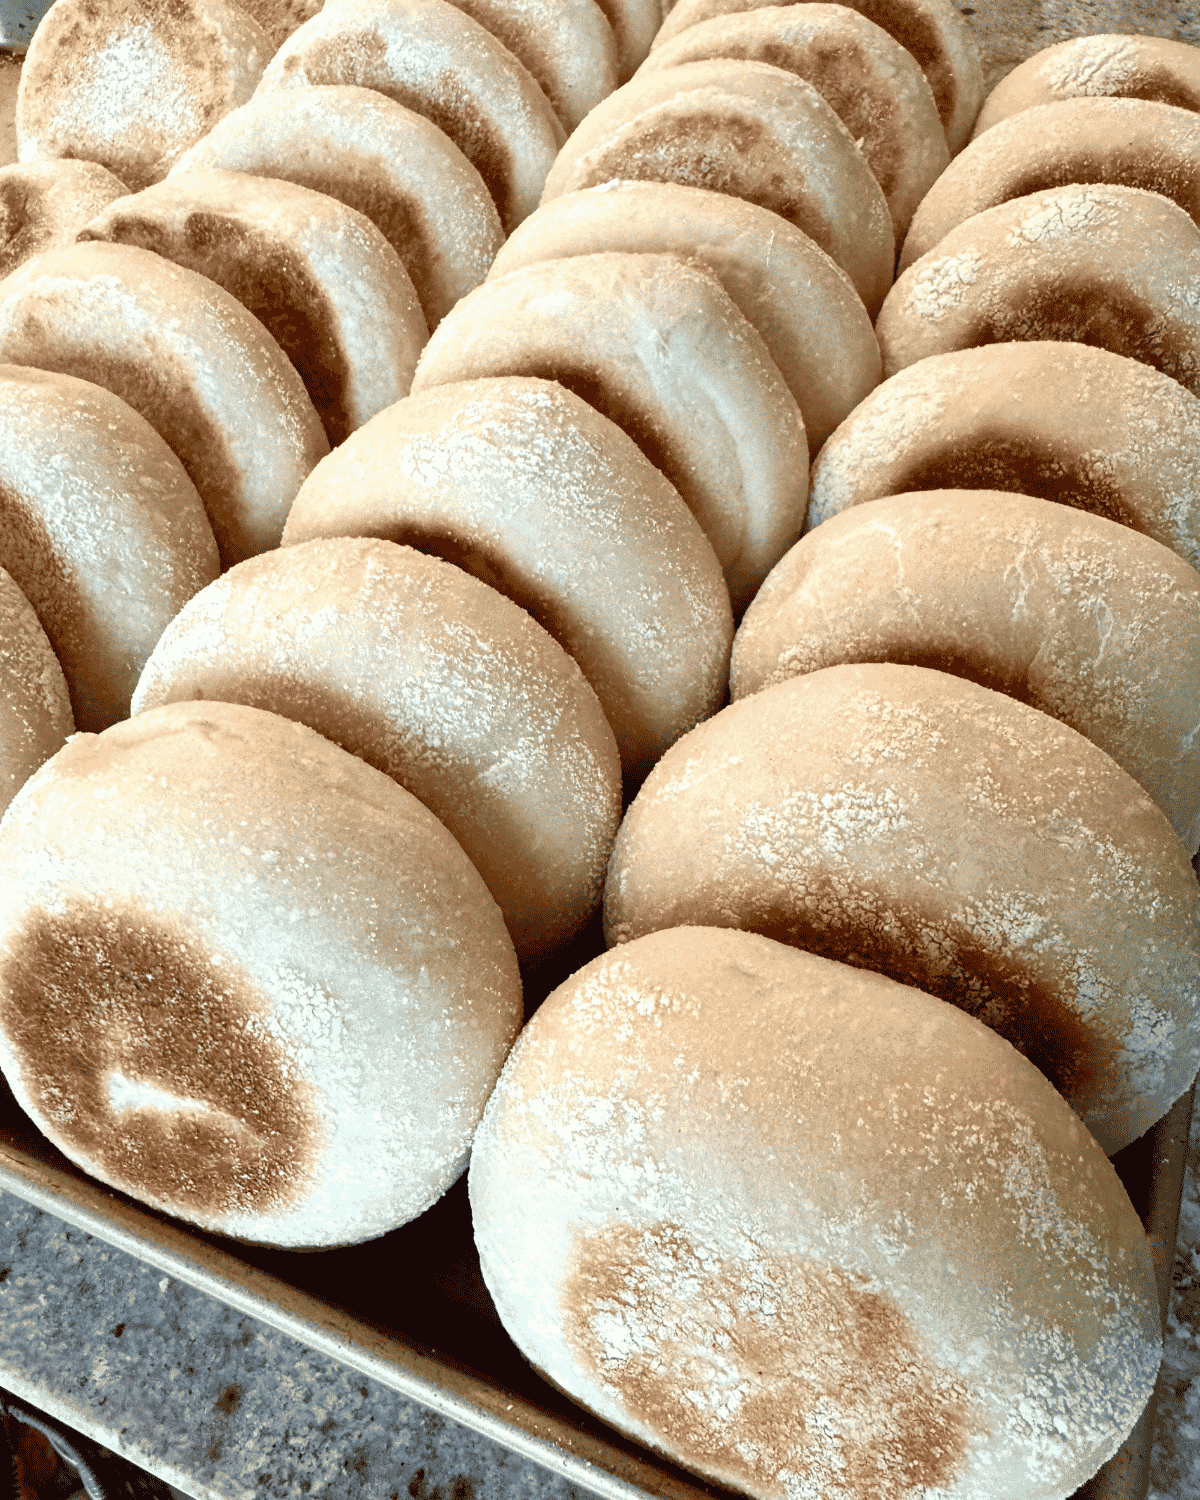
My first batch of English muffins puffed up beautifully — almost too beautifully. I got distracted, and when I finally went to flip them, the bottoms were charred black. I ended up slicing off the burnt crust on all three and eating the non burnt muffin halves, and honestly? They were still some of the best English muffins I’d ever had. Don’t do what I did there — keep an eye on your skillet — but that first bite told me everything I needed to know about how good this sourdough english muffins recipe really is. Low, slow, and steady is the way to go, and once I dialed that in, these became the muffins my family fights over before they’ve even finished cooling.
If you’ve ever pulled apart a store-bought English muffin and found it a little flat and one-note in flavor, you’re going to love what natural fermentation does here. This dough spends real time developing flavor before it ever sees a skillet, and the payoff is a muffin that’s soft, fluffy, and packed with a deep, tangy flavor you just can’t get from a yeasted dough on a rushed timeline.
A Little English Muffin History (and Why Sourdough is a Game Changer)
Traditional English muffins date back to 18th century England as a stovetop bread served with tea or breakfast. They were originally a humble hybrid between bread and crumpets—chewy, slightly tangy, and full of nooks and crannies ready to soak up every bit of butter.
But when sourdough enters the chat? The flavor transforms. Natural fermentation doesn’t just bring depth and tang—it also unlocks a whole new level of nutrition. Thanks to the long, slow rise, phytic acid is broken down, making nutrients more bioavailable. Even better? That bubbly, active starter is teeming with gut-friendly bacteria that support digestion and overall gut health. No commercial yeast. No additives. Just real ingredients doing real magic—flavor-packed and good for your belly.
Why This Recipe Works
- Flavorful & Healthy: Thanks to wild fermentation, these muffins develop a complex tang and are easier to digest.
- Soft & Crispy: A slightly enriched dough gives you that pillowy interior and golden, crisped exterior when toasted.
- Stand Mixer Friendly: This dough is mixed and developed in a stand mixer, which helps build strong gluten structure with ease.
- Freezer Friendly: Make a big batch and freeze them. Pop them in the toaster and boom—fresh bakery goodness in minutes.
- Sweet or Savory? Yes. These muffins are endlessly versatile—equally delicious with a smear of jam or layered with bacon, egg, and cheese.
Yields: 14 muffins
Ingredient Breakdown
For the starter build (the night before):
- 25g (about 2 tablespoons) mature sourdough starter — This is your leaven. It doesn’t need to be huge, just healthy and active, because it has all night to multiply and develop flavor.
- 75g (about ⅓ cup) water — Room temperature is fine. This feeds the starter and helps it build volume overnight.
- 75g (about ⅔ cup) flour — This, combined with the water, is what your small amount of starter will feast on overnight to become the 150g of active starter the main dough calls for.
For the dough:
- 600g (about 4¾ cups) bread flour — Bread flour’s higher protein content is non-negotiable here if you want that chewy, structured crumb English muffins are known for. All-purpose flour will work in a pinch, but expect a slightly softer, less chewy result.
- 230g (about 1 cup) milk — Milk adds richness and tenderness and helps the crust brown beautifully in the skillet. Whole milk gives the richest result, but 2% will work too.
- 150g (about ⅔ cup) water — Balances the milk so the dough isn’t overly rich or dense, and keeps the crumb light.
- 40g (about 3 tablespoons) granulated sugar or honey — A small amount of sweetness feeds fermentation and encourages that deep golden crust in the skillet. Honey will lend a slightly more complex, floral note if you want to swap it in.
- 150g (about ⅔ cup) active sourdough starter, at peak — This is the overnight starter build from above. “At peak” means it’s domed, bubbly, and has roughly doubled — that’s when its leavening power is strongest.
- 10g (about 1¾ teaspoons) salt — Controls fermentation speed and, just as importantly, makes sure your muffins taste like something. Don’t skip it or eyeball it low; salt is what keeps sourdough from tasting flat.
- 4 tablespoons (56g) butter, melted — Adds richness, tenderness, and helps create that soft, pull-apart texture inside the muffin.
- 1 large egg — Adds structure, richness, and a subtle golden color to the crumb.
- Cornmeal or semolina, for dusting — This isn’t just decorative. It keeps the dough from sticking as it proofs and cooks, and it’s part of what gives an English muffin its signature look and slight crunch on the outside.
Step-by-Step Directions with Tips
Step 1: Build Your Starter the Night Before
Combine the 25g starter, 75g water, and 75g flour in a small jar or bowl. Stir until no dry flour remains, cover loosely, and leave it at room temperature overnight.
💡 Pro Tip: Most recipes will tell you to feed your starter a fixed number of hours before baking and leave it at that. In reality, you have more flexibility than that. If your schedule doesn’t line up with “the night before,” you can build this starter and store it in the fridge for up to two days before you need it — just pull it out and let it come back to room temperature before using it in the dough. Real life doesn’t run on a recipe’s timeline, and your starter can adapt to yours.
Step 2: Mix the Dough
The next morning, once your starter is domed and bubbly, combine the milk, water, starter, egg, sugar, flour, and salt in the bowl of a stand mixer fitted with a paddle attachment, or a medium mixing bowl if you’re working by hand.
Mix on low speed just until everything comes together into a shaggy mass, then increase to medium speed and mix for about 5 minutes (if the mixer is struggling at this point with the paddle attachment, you can switch to a dough hook). If you’re mixing by hand, knead until the dough comes together — it WILL be sticky, and that’s exactly what it should be at this stage, don’t be tempted to add more flour. Let the dough rest, covered, for 30 minutes.
⚠️ Watch Out: Don’t be tempted to add extra flour to make this initial dough less sticky. Enriched sourdough doughs are almost always tacky before the rest period and the butter incorporation. Extra flour now means dense, tight muffins later.
Step 3: Add the Butter
After the rest, turn the mixer back to medium speed and slowly drizzle in the melted butter, mixing for about 5-7 minutes total, or until the dough turns smooth, elastic, and starts pulling cleanly away from the sides of the bowl. If mixing by hand, work in all the butter and knead until it’s fully absorbed — this will take some elbow grease, but the dough will come together.
You’re looking for a dough that feels supple and slightly tacky, but no longer sticky to the point of clinging to your fingers.
Step 4: First Rest
Transfer the dough to a straight-sided container — a large glass measuring bowl or a clear container works well — and pat it down gently so you can clearly see the starting level. This matters more than it sounds like it should; you’re setting yourself up to track rise by volume, not guesswork. Cover with plastic wrap and let it rest for 30 minutes.
Step 5: Coil Folds
If you mixed with a stand mixer, perform two coil folds, spaced 30 minutes apart. If you mixed by hand, perform four coil folds, also 30 minutes apart, since hand-mixing builds less gluten strength up front.
To coil fold: wet your hands slightly, reach under one side of the dough, lift it up and let it fold underneath itself, then rotate the bowl a quarter turn and repeat on all sides. This gently strengthens the dough without knocking out the gas you’re working so hard to build.
Step 6: Bulk Rise
Let the dough rise in a warm spot until it has increased by about 50% in volume.
⚠️ Watch Out: This is the single biggest myth I correct in my classes — following bulk fermentation by the clock instead of watching the dough itself. Every kitchen is a different temperature, every starter is a different strength, and “3 hours” in one home might mean “5 hours” in another. Use that level you marked in Step 4 as your reference point and watch for actual volume increase — in this case, about 50% — rather than trusting a stopwatch. This is the more reliable, professional approach, and it’s the difference between muffins that are properly light and airy versus dense and gummy.
Step 7: Refrigerate
Once the dough has risen by 50%, transfer it to the refrigerator for anywhere from 6 to 24 hours. This cold rest does double duty: it firms the dough up for much easier shaping, and it continues to slowly deepen the sourdough flavor.
Step 8: Shape Your Muffins
You have two good options here, and neither one is more “correct” than the other — pick based on how much precision you want.
Shaping Method 1 (rustic, cutter-based): Turn the chilled dough out onto a floured counter. Lightly flour the top and gently spread and pat it down until it’s just under an inch thick. Line two baking sheets with parchment and sprinkle generously with cornmeal or semolina. Use a 2½-inch round cutter to cut your muffins, transferring each one gently with a spatula. Gently knead the scraps back together, re-roll, and keep cutting until the dough is used up.
Shaping Method 2 (precise, weighed portions): Turn the dough out onto a lightly floured counter and use a dough scraper or knife to divide it into 14 even pieces — a digital scale helps here, aiming for about 90–95g each. Shape each piece into a ball and let rest for 30 minutes. Then tighten the shape of each ball, dip both sides in cornmeal, and place on parchment squares on your sheet pan.
Whichever method you choose, cover the pans loosely with plastic wrap and let the muffins rise in a warm spot until doubled in size.
Step 9: Preheat and Prep
Preheat your oven to 375°F — you’ll use this at the end to confirm doneness, not to bake the muffins from scratch. Place a large skillet over medium heat.
Step 10: Cook the Muffins
Once you can feel gentle warmth when you hold your hand a few inches above the skillet surface, lower the heat to low. Sprinkle the surface with cornmeal or semolina, then carefully place 3 muffins in the pan, leaving room for them to grow. Cover and cook for 3 to 5 minutes, until the bottoms are browned and the tops look dry rather than wet and doughy.
Carefully flip and cook another 3 to 5 minutes, until the second side is browned as well. Keep an eye on them throughout — English muffins can go from perfectly golden to too dark quickly once a skillet has had a chance to build up heat between batches.
⚠️ Watch Out: If your muffins are browning too fast before the tops look dry, turn the heat down further. Low and slow is what gives the center time to cook through before the crust over-browns — rushing this step is the single most common reason home bakers end up with muffins that are gummy in the middle.
Step 11: Confirm Doneness
Use a probe thermometer to check the internal temperature right in the center of a muffin. You’re looking for at least 198°F. If it reads lower, transfer the muffins to your preheated 375°F oven for a few minutes to finish baking through.
Between batches, clear off any burnt cornmeal from the skillet and add a fresh sprinkle before continuing. If this is your first time making this recipe, cook a single test muffin first so you can dial in your burner heat before committing the whole batch.
No skillet? No problem. You can skip the stovetop entirely and bake these on a preheated baking sheet or pizza stone in your 375°F oven, flipping halfway through. They’ll turn out a touch paler on the outside, which actually works in your favor if you plan to toast them anyway.
Enjoy these warm, split open with a fork — never a knife, which flattens that soft, fluffy interior — and slathered with butter while it’s still melting into every corner.
Sourdough Tools You’ll Want on Hand
- Digital kitchen scale — Essential for weighing both your ingredients and your dough portions if you use Shaping Method 2.
- 2½-inch round cutter — For Shaping Method 1; a drinking glass of the right size works in a pinch.
- Large, heavy-bottomed skillet or griddle — Even heat distribution is what prevents scorched bottoms, so reach for the heaviest pan you own.
- Instant-read or probe thermometer — The most reliable way to confirm doneness without cutting into a muffin and losing steam and structure.
- Bench scraper — Makes dividing and shaping the chilled, slightly firm dough much easier to manage.
How to Store & Freeze
Room temperature: Once fully cooled, store your English muffins in a paper bag or loosely covered container for up to 2 days, or in a sealed bag or container for up to 4–5 days. A fully airtight container speeds up staling less than you’d think with a bread this enriched, but a paper bag helps preserve the crust if that matters more to you than shelf life.
Refrigerator: I don’t recommend the fridge for these. Refrigeration actually accelerates staling in bread through a process called starch retrogradation, so your muffins will go stale faster in the fridge than they would sitting on the counter. Save the fridge space for your starter, not your baked muffins.
Freezer: These freeze exceptionally well. Let them cool completely, then split them with a fork (this makes toasting from frozen much faster later) and store split halves in a freezer-safe bag with the air pressed out, for up to 3 months. To thaw and serve, pop the frozen halves directly into the toaster — no need to defrost first. To re-crisp a whole, unsplit muffin from frozen, wrap it loosely in foil and warm it in a 300°F oven for about 10–15 minutes before splitting and toasting.
Troubleshooting
Problem: The outside is dark, but the middle is gummy or undercooked. Why it happened: The skillet was too hot. High heat sets the crust before the center has had time to fully cook through. How to fix it: Lower your burner to low heat and constantly check the bottom of the muffins, flip as soon as the color is where you want it to be. Use a probe thermometer in the center to check temperature (needs to be at least 198°F); if not quite there, finish them in the oven if needed.
Problem: The muffins stuck to the pan or fell apart when I flipped them. Why it happened: Not enough cornmeal or semolina on the cooking surface, or flipping too early before a proper crust had formed on the bottom. How to fix it: spray the pan with oil spray, then sprinkle with the cornmeal between batches, and wait until the bottom is genuinely browned and the top looks dry before attempting to flip.
Problem: My dough was impossible to shape — sticky and unmanageable. Why it happened: The dough likely didn’t get its full refrigerator rest. The dough is supposed to be sticky as this is a higher hydration dough to allow for that fluffy interior with nooks and crannies. How to fix it: Don’t rush the chill — a full 6 hours minimum firms the dough enough to handle and use plenty of flour on your hands when shaping. If your kitchen is warm, you can even pop the dough back in the fridge for 15–20 minutes mid-shaping if it starts to soften too much.
FAQ
Can I make sourdough English muffins with discard instead of active starter? Yes you can, but you will need to also add instant yeast as well to help with dough rise. About half a teaspoon will do.
Do I need a stand mixer to make this recipe? No. The instructions include hand-mixing directions throughout, including how to adjust your coil folds and butter incorporation if you’re kneading by hand instead of using a mixer.
Why are my sourdough English muffins flat instead of puffy? This is almost always a fermentation issue — either the starter wasn’t fully active when mixed in, or the bulk rise and final proof were cut short. Watch for actual volume change rather than relying on a set time.
Can I skip the overnight starter build? You can, if you already have 150g of starter at peak and ready to go in the fridge that was at peak no longer than 2 days ago.
How long can I let the dough sit in the fridge before shaping? Anywhere from 6 to 24 hours works well. The shorter end gives you a slightly softer dough to shape; the longer end deepens the tang and makes the dough a little easier to handle.
Do I really need a cast iron skillet, or will any pan work? Any large, heavy-bottomed pan or griddle will do the job — the heavy base is what matters most, since it holds steady, even heat and helps prevent the scorched-then-raw problem that thin pans are prone to.
The Best Sourdough English Muffins You’ll Ever Eat
Ingredients
Method
- Combine the 25g starter, 75g water, and 75g flour in a small jar or bowl. Stir until no dry flour remains, make sure the consistency is thick like hummus, if it is not, add a little more flour, cover loosely, and leave it at room temperature overnight until it's at peak.
- Combine the milk, water, starter, egg, sugar, flour, and salt in the bowl of a stand mixer fitted with a paddle attachment, or a medium mixing bowl if you're working by hand.
- Mix on low speed just until everything is well combined, then increase to medium speed and mix for about 5 minutes (if the mixer is struggling at this point with the paddle attachment, you can switch to a dough hook). If you're mixing by hand, knead until the dough comes together — it WILL be sticky, and that's exactly what it should be at this stage, don't be tempted to add more flour. Let the dough rest, covered, for 30 minutes.
- Step 3:
- After the rest, turn the mixer back to medium speed and slowly drizzle in the melted butter, mixing for about 5-7 minutes total, or until the dough turns smooth, elastic, and starts pulling cleanly away from the sides of the bowl. If mixing by hand, work in all the butter and knead until it's fully absorbed — this will take some elbow grease, but the dough will come together.
- Step 4:
- Transfer the dough to a straight-sided container — a large glass measuring bowl or a clear container works well — and pat it down gently so you can clearly see the starting level. Cover with plastic wrap. Rest 30 min.
- Step 5:
- If you mixed with a stand mixer, perform two coil folds, spaced 30 minutes apart. If you mixed by hand, perform four coil folds, also 30 minutes apart, since hand-mixing builds less gluten strength up front.To coil fold: wet your hands slightly, reach under one side of the dough, lift it up and let it fold underneath itself, then rotate the bowl a quarter turn and repeat on all sides. This gently strengthens the dough without knocking out the gas you're working so hard to build.
- Step 6:
- Allow to rise by 50% in size in a warm spot.
- Step 7:
- Refrigerate the dough from 6-24 hrs. This cold rest does double duty: it firms the dough up for much easier shaping, and it continues to slowly deepen the sourdough flavor.
- Step 8:
- Shaping Method 1 (rustic, cutter-based): Turn the chilled dough out onto a floured counter. Lightly flour the top and gently spread and pat it down until it's just under an inch thick. Line two baking sheets with parchment squares and sprinkle generously with cornmeal or semolina. Use a floured 2½-inch round cutter to cut your muffins, transferring each one gently with a floured bench scraper. Gently dust off the flour from the scraps and knead back together, re-roll, and keep cutting until the dough is used up.
- Shaping Method 2 (precise, weighed portions): Turn the dough out onto a lightly floured counter and use a dough scraper or knife to divide it into 14 even pieces — a digital scale helps here, aiming for about 90–95g each. Shape each piece into a ball and let rest for 30 minutes. Then tighten the shape of each ball, dip both sides in cornmeal, and place on parchment squares on your sheet pan.
- Whichever method you choose, cover the pans loosely with plastic wrap and let the muffins rise in a warm spot until doubled in size.
- Step 9:
- Preheat your oven to 375°F — you'll use this at the end to confirm doneness, not to bake the muffins from scratch. Place a large skillet over medium heat.
- Step 10:
- Allow you skillet to preheat on the stove for a few min, then lower the heat to low. Spray the skillet with some oil, then carefully place 3 muffins in the pan with the parchment square underneath, leaving room for them to grow. Cover and cook for 3 to 5 minutes, until the bottoms are just browned and the tops look drier. If bottoms are browning too soon, lower the heat.Carefully flip peel off the parchment square and cook another 3 to 5 minutes, until the second side is browned as well. Keep checking on them to make sure they don't get too browned.
- Step 11:
- Use a probe thermometer to check the internal temperature right in the center of a muffin. You're looking for at least 198°F. If it reads lower, transfer the muffins to your preheated 375°F oven for a few minutes to finish baking through.Between batches add a fresh spray of oil before continuing.
Notes
Adjust the burner heat as needed while cooking the muffins. I usually don’t step away from them, regularly checking the bottoms. Each batch cooks different, so keep an eye on them.
You can skip the skillet and bake your muffins on a preheated baking sheet or pizza stone, flipping them half way. They turn out a little more pale on the outside, but that works great for toasting the muffin later.
