The Best Sourdough Potato Sandwich Bread Recipe
A couple of years ago, I was reading The Four Winds by Kristin Hannah — if you haven’t read it yet, put this recipe on pause and go get it — and there was a small moment in the story that I could not stop thinking about. Elsa Wolcott, in the middle of the Depression, saves her potato water to use in her bread dough. Nothing goes to waste. The water she boiled her potatoes in isn’t just water anymore — it’s carrying starch, minerals, and a quiet earthy richness that changes what the dough can do.
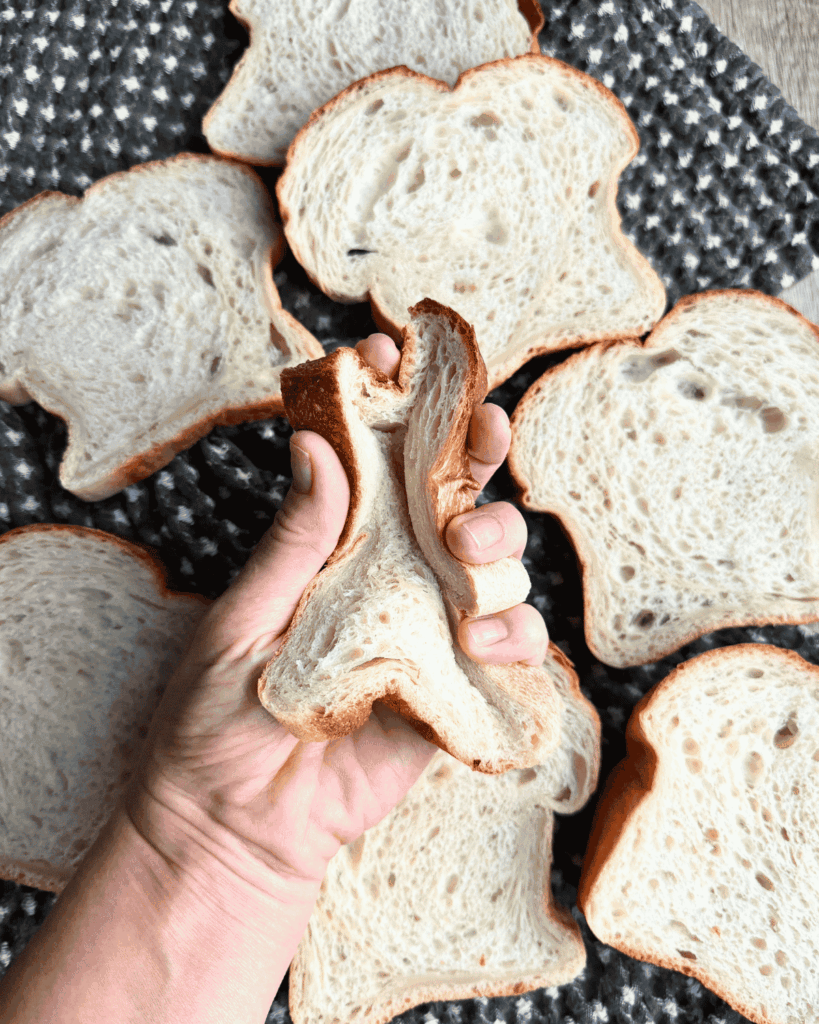
I closed the book and filed that detail away in the back of my mind, the way you do with an idea you know you’ll come back to eventually. Then, months later, I came across a rye bread that used mashed potato as a moisture keeper, and it clicked. The potato didn’t just make the crumb soft — it made it stay soft, not just warm from the oven but the next day, and the day after that. That’s when I decided to build a sourdough potato bread of my own, using both the mashed potato and the water it cooked in, and this sourdough potato sandwich bread is the result. It is, without exaggeration, the softest, moistest, most pillowy sandwich loaf I have ever pulled out of a pan.
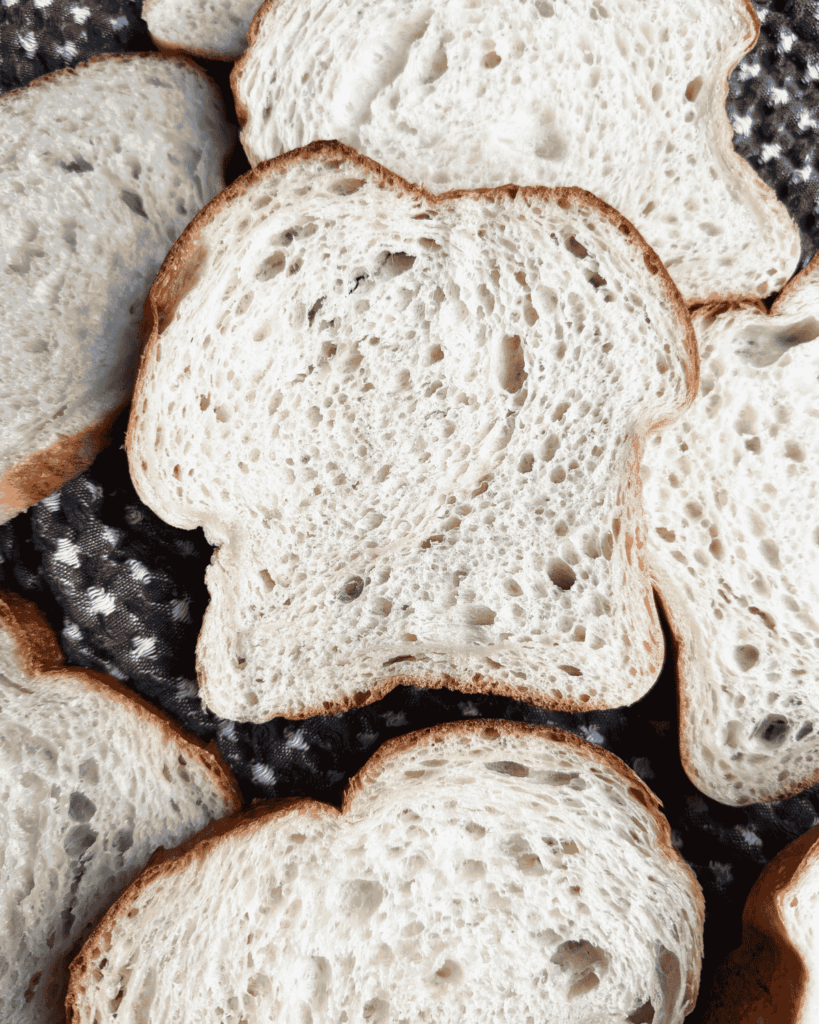
What Is This Recipe?
This sourdough potato sandwich bread is an enriched sourdough loaf built around two forms of potato: cold riced (or well-mashed) potato folded directly into the dough, and the cold starchy water the potatoes were cooked in, used as part of the liquid. Most potato bread recipes you’ll find online use one or the other. This one uses both, and the difference is noticeable — the crumb is tighter and more tender than a standard enriched dough, with a softness that holds up far longer than bread made with butter and eggs alone.
It’s built as a true sandwich bread: baked in a loaf pan, mild in flavor, with just enough tang from the sourdough starter to remind you it’s naturally leavened, but not so much that it competes with whatever you put between the slices. Think of it as a bridge between a classic potato bread and a soft sourdough sandwich loaf — approachable enough for a first-time potato bread baker, but with technique underneath it that will teach you something new even if you’ve baked a dozen sourdough loaves before.
Why You’ll Love It
- The softest crumb you’ll get from a sourdough loaf. The starch in the potato locks moisture into the crumb at a structural level, not just on the surface — so it stays soft for days, not hours.
- It’s the ultimate sandwich bread. Neutral, slightly sweet flavor that lets fillings shine, with enough structure to hold up to a hearty grilled cheese or a stacked turkey sandwich.
- You’re using the whole potato. No waste, plenty of flavor — the potato water isn’t a garnish here, it’s doing real work in the dough.
- Flexible for real schedules. Cold fermentation in the fridge means you can mix the dough one evening and bake the next day, or skip cold ferment and bake same day.
- A technique-builder, not just a recipe. You’ll practice reading dough by feel and by rise, not just by the clock — a skill that will make you a better sourdough baker across every loaf you make from here on out.
- The gut-health benefits of naturally leavened bread, in a loaf soft enough to win over anyone at your table who says they “don’t like sourdough.”
Ingredient Breakdown
Potato water, cold — 175g (¾ cup) This is the reserved water you boiled your potatoes in, cooled completely and chilled before using. It’s carrying dissolved starch and minerals from the potato, and those starches gelatinize during baking, which is a big part of why this crumb stays moist for so long. Don’t substitute plain water here if you can help it — you’d be leaving real flavor and function on the table. Make sure it’s fully cooled; warm liquid added to cold ingredients in this recipe can push your dough temperature too high too fast.
Mashed potato, cold — 130g (about ½ cup, packed) I use Yukon Gold potatoes most often because they’re naturally creamier and blend into the dough more seamlessly, but russet potatoes work beautifully too and bring a slightly higher starch content, which some bakers actually prefer for an even softer crumb. Whichever you choose, cook the potato until it is completely falling-apart tender, strain and allow to sit uncovered to cool then mash or rice it until there are no lumps — a potato ricer is the easiest way to get a smooth, even texture with no extra effort.
💡 Pro Tip: Have leftover mashed potatoes from dinner? Use those. Just swap the potato water for 175g (¾ cup) of plain water instead, since you won’t have starchy cooking water on hand. It’s a great way to use up extras, and the loaf will still turn out soft and tender.
Sourdough starter, active, at peak — 125g (about ½ cup) Your starter needs to be active and at peak — bubbly, risen, and dome leveled off and dimpling — for this dough to rise properly. I like to feed my starter the night before and allow it to rise overnight ready and peak the next morning.
💡 Pro Tip: Don’t have an active starter ready to go? You can make this loaf with 125g of sourdough discard plus ½ tsp instant yeast instead. You’ll get the same tangy depth of flavor from the discard, with the instant yeast handling the actual rise, so this is a great option on a day when your starter isn’t at peak but you still want to bake.
Egg — 1 large The egg adds richness, structure, and a little extra lift to the crumb, working alongside the potato to build that soft, tender texture. Use a large egg straight from the fridge, in keeping with the “keep everything cold” approach this dough needs.
Sugar or honey — 30g (about 2½ Tbsp sugar, or 1½ Tbsp honey) This is a small amount of sweetness, not enough to make the bread taste like a dessert bread, but enough to feed the yeast activity, round out the flavor, and help the crust brown beautifully in the oven. Either sugar or honey works well here — honey will add a faint floral note if that’s something you enjoy.
Bread flour — 435g (about 3½ cups) Bread flour’s higher protein content gives this enriched, potato-heavy dough the structure it needs to hold its shape and rise well despite all the moisture you’re adding. I don’t recommend swapping in all-purpose flour for this one — with this much liquid and fat in the dough, you need the extra gluten strength bread flour provides.
Salt — 10g (about 1¾ tsp fine sea salt) Salt isn’t just for flavor — it also tightens the gluten structure and helps regulate fermentation speed, keeping your starter from working too fast or too erratically.
Unsalted butter, soft — 40g (about 3 Tbsp) Added gradually, a tablespoon at a time, toward the end of mixing. The butter coats the gluten strands and adds tenderness and a rich flavor, and adding it slowly gives the dough time to fully absorb each addition before you add more, which keeps the final texture smooth rather than greasy.
Step-by-Step Directions with Tips
Step 1: Prep Your Potato and Potato Water
Peel and cube your potatoes, then boil until completely fork-tender — you want them falling apart, not just cooked through. Reserve the cooking water before you drain the potatoes; you’ll need 175g of it, cooled completely. Run the potatoes through a potato ricer, or mash thoroughly until there are no lumps. Measure out 130g of the mashed potato. Let both the potato and the potato water cool fully to room temperature, then chill in the fridge until cold.
💡 Pro Tip: This step and Step 2 are best done the night before, so both are ready to go by next morning, OR these 2 steps can be prepped early morning of, so both are ready by around noon. Either timeline works — just make sure the potato and potato water are fully cold before you move on to mixing in the stand mixer.
Step 2: Feed Your Starter
Feed your sourdough starter so it has time to become active and reach peak — bubbly, risen, with the dome leveling off and showing dimpling on the surface. Depending on your starter’s strength and your kitchen’s temperature, feed a ratio fitting for the environment. My kitchen is between 68-70F overnight, so I feed my starter a 1:3:3 ratio. An example of that would be 25g starter : 75g water : 75g flour, this gives you a total of 175g of starter at peak the next morning, you’ll use 125g for the recipe and have 50g left over to go back in the fridge. If feeding your starter in the morning, you’ll feed a 1:1:1 ratio so it bulks up fastest. 50g starter : 50g water : 50g flour.
Step 3: Mix the Dough
Place the cold potato water, cold mashed potato, active starter, egg, sugar or honey, bread flour, and salt into the bowl of a stand mixer fitted with a dough hook. Mix on medium speed for 5–7 minutes, until everything is well combined. Check your dough, if it looks too hydrated, add 25g of flour, or if it’s too stiff, add 10g-15g of water because depending on the type of potato used and humidity, you may need to add more flour or more water. It should be a firm dough – sandwich bread dough is supposed to be less hydrated then an artisan sourdough loaf.
With the mixer still running, add the soft butter one tablespoon at a time, waiting for each addition to be fully incorporated before adding the next. This whole process — from the start of mixing to the last of the butter going in — takes roughly 15-20 minutes total.
⚠️ Watch Out: Using cold ingredients here isn’t optional, it’s essential. A stand mixer generates friction heat quickly, and this dough has enough fat and starch in it that it can overheat fast if you start warm. Overheated dough ferments unevenly and can produce a gummier crumb.
You’ll know the dough is ready when it’s smooth, light, and glossy, and it’s pulling cleanly off the sides of the bowl to wrap around the hook.
Step 4: Check the Dough Temperature
Transfer the dough to a straight-sided container — a measuring bowl or dough bucket works well — and pat it down flat. Note where the dough sits so you can track its rise later. Check the internal temperature with an instant-read thermometer. If it’s over 85°F, pop it in the fridge for about an hour to bring it back down before moving on. If it’s at or under 85°F, you’re ready for the next step.
Step 5: Stretch and Folds, Then Bulk Rise
Let the dough rest at room temperature and perform two sets of stretch and folds, spaced about 40 minutes apart. This builds strength and structure in a dough that’s too soft and enriched to knead by hand for long.
After the second set, let the dough continue to rise at room temperature until it has increased in volume by about 50%.
💡 Pro Tip: This is where I want you to unlearn the habit of watching the clock. The most common mistake I see beginner bakers make is following a bulk fermentation time to the minute instead of watching what the dough is actually doing. Your kitchen temperature, your starter’s strength, and the season all change how fast this happens — sometimes dramatically. Use the fill line you marked in Step 4 to track a genuine 50% rise in volume, not just an estimated bake time on the clock. It’s a small shift in habit that will make every loaf you bake more consistent.
Step 6: Cold Ferment
Once the dough has risen by about 50%, cover the container and move it to the fridge for a cold ferment of 8 to 24 hours. This slow, cold rise is where a lot of this bread’s flavor develops, and it’s also what makes this recipe genuinely flexible for a real schedule — mix in the evening, bake the next afternoon, or push it a little further if your day runs long. If skipping cold ferment, once the dough reaches a 50% rise proceed to step 7.
Step 7: Shape the Loaf
Turn the dough out onto a lightly floured surface. Flatten it into a rectangle or use a rolling pin, oriented sideways in front of you. Fold the left and right sides in toward the center so the width matches the length of your loaf pan, then roll the dough up snugly from the bottom, keeping the tension even as you go.
Place the shaped dough seam-side down into a lined and greased 9×4-inch loaf pan.
Step 8: Final Proof
Cover the pan and let the dough proof at room temperature until it has doubled in size. This step, unlike the earlier stretch-and-fold rise, is a good place to actually look for doubling — the dough should be visibly domed above the rim of the pan, and it should feel airy and slightly springy, not tight, when you gently press it.
Step 9: Bake
Bake at 375°F for 40-45 minutes, until the internal temperature reads between 198°F and 205°F on an instant-read thermometer. Because this dough has more sugar and richness than a lean sourdough loaf, keep an eye on the crust color in the last 10 minutes — tent it loosely with foil if it’s browning faster than the inside is finishing.
⚠️ Watch Out: Don’t rely on crust color alone to know it’s done. Enriched doughs like this one can look fully golden well before the interior has actually finished baking. Internal temperature is the only reliable indicator here.
Step 10: Cool
As soon as it comes out of the oven, remove the loaf from the pan and brush the top generously with butter — this softens the crust and adds a beautiful sheen and flavor. Remove the pan liner and cool the loaf completely on a wire rack before slicing.
⚠️ Watch Out: I know it’s tempting to cut into this while it’s warm, but slicing hot bread lets steam escape too quickly and dries out the crumb. Give it at least an hour to finish setting.
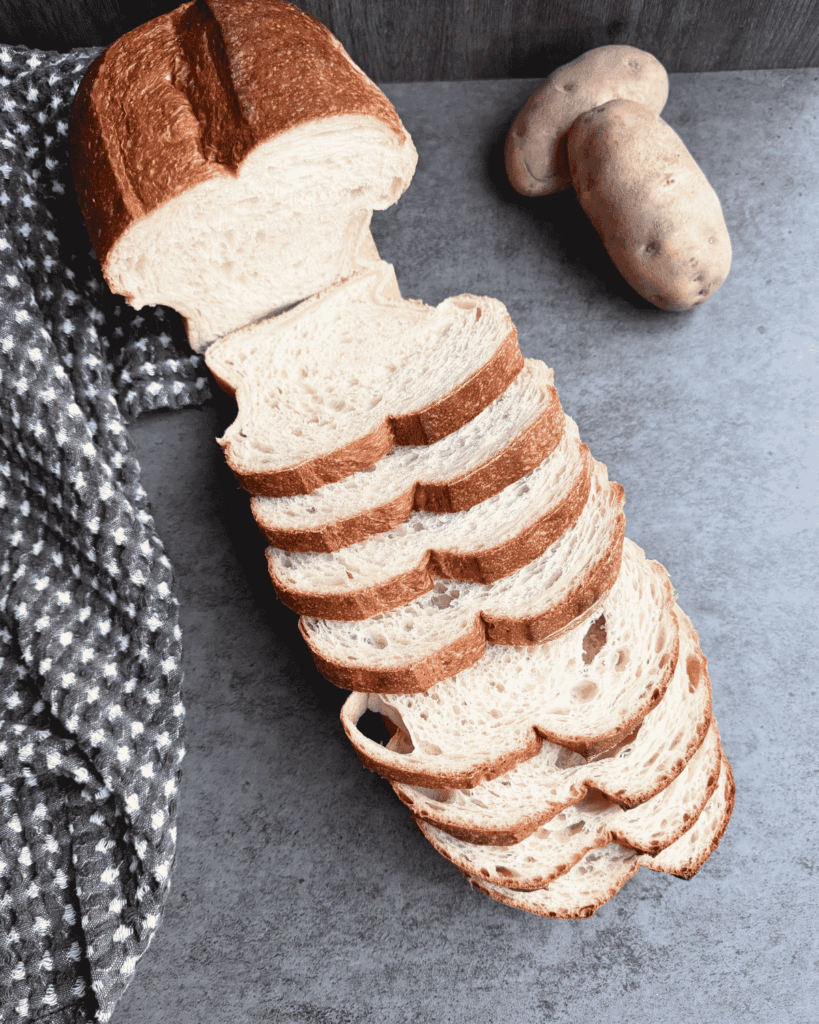
How to Store & Freeze
Room temperature: Once fully cooled, store this loaf in a bread bag or an airtight container at room temperature for up to 4 days. Thanks to the potato and potato water, it will stay noticeably softer for longer than a standard enriched sandwich loaf. Just make sure to keep an airhole open if it is in a plastic bag so the moisture doesn’t produce mold spots.
Refrigerator: I don’t recommend refrigerating this bread once baked. Cold temperatures actually speed up staling in bread through a process called retrogradation, so a fridge will dry this loaf out faster than the counter will, not slower.
Freezer: This bread freezes beautifully. Slice it first, place a small piece of parchment paper between each slice before placing in a freezer bag or airtight container — this way you can pull out exactly as many slices as you need. It will keep well for up to 3 months. To thaw, let slices come to room temperature on the counter, or pop them directly into the toaster from frozen.
Troubleshooting
Problem: My dough was extremely sticky and wouldn’t come together in the mixer. Why it happened: Potato moisture content varies quite a bit depending on the variety and how well-drained it was after cooking. If your mashed potato was on the wetter side, your dough will be too. How to fix it: Add bread flour a tablespoon at a time until the dough starts pulling cleanly from the sides of the bowl. Resist adding it all at once — a little goes a long way in a dough this enriched.
Problem: My dough barely rose during bulk fermentation. Why it happened: This is almost always a starter or temperature issue — either your starter wasn’t truly at peak activity when you mixed the dough, or your kitchen is on the cooler side and fermentation is simply moving slowly. How to fix it: Consider giving bulk fermentation more time rather than more heat. A slower rise at a stable temperature is more reliable than a fast one that’s been rushed.
Problem: The crumb turned out dense instead of soft and pillowy. Why it happened: This usually points to under-mixing (the gluten never fully developed) or a rushed bulk fermentation that didn’t hit that 50% rise mark before the loaf went into the fridge or it didn’t rise enough when in the pan. How to fix it: Make sure your dough is smooth, glossy, and wrapping around the hook before you stop mixing, and use the fill-line method from Step 3 to confirm you’ve actually hit 50% rise. Additionally, make sure you give it a decent rise when it is in the loaf pan next time.
Problem: My loaf collapsed slightly after baking. Why it happened: This is often a sign of overproofing during the final rise — the gluten structure was stretched past its limit before the loaf went into the oven. How to fix it: Watch for a loaf that’s domed and springs back slowly when gently pressed, rather than pushing the final proof until it’s ballooning well past the rim of the pan.
Sourdough Tools You’ll Want for This Recipe
- The best stand mixer with spiral hook — a workhorse that develops gluten in even the stiffest dough
- 9×4-inch loaf pan — the right size to get that classic tall sandwich-bread shape
- Kitchen scale — essential for accurate and consistent measuring results
- 4-cup measuring cup — set of 2, great for measuring dough percentage rise
- Instant-read thermometer — the most reliable way to confirm doneness at 200°F
- Perfect Slices Bread Slicer – this tool is amazing, it folds up and stores easily and makes perfect slices
- Potato ricer — The fastest, most reliable way to get a perfectly smooth, lump-free mashed potato for the dough.
FAQ
Can I use russet potatoes instead of Yukon Gold? Yes. Russets have a higher starch content and work great in this recipe — some bakers actually prefer the extra softness they bring to the crumb. Yukon Golds are just naturally creamier, which I love for how easily they mash and blend into the dough.
Do I have to use a stand mixer for this recipe? I strongly recommend it. This dough is pretty stiff and enriched with butter, and developing proper gluten structure by hand is a real workout and much harder to judge by feel. If you don’t have a stand mixer, expect a longer, messier hand-kneading process and a slightly less consistent result.
Can I skip the potato water and just use regular water? You can, but you’ll lose part of what makes this bread special. The potato water carries dissolved starch that helps keep the crumb moist for longer, so I’d encourage you to save it next time you boil potatoes for literally any reason.
Can I make this bread dairy-free? This particular recipe is already dairy-free as written — there’s no milk in the dough, just butter. If you want it fully vegan, you could experiment with a plant-based butter substitute, though I haven’t tested that swap myself.
How long does my starter need to be fed before I bake this? Your starter needs to be active and at peak when you mix the dough, but it doesn’t need to be fed same-day. Feed it and store it in the fridge for up to three days ahead of time, then use it straight from cold when you’re ready to bake.
The Best Sourdough Potato Sandwich Bread Recipe
Ingredients
Method
Night Before
- Peel and cube your potatoes, then boil until completely fork-tender — you want them falling apart, not just cooked through. Reserve the cooking water before you drain the potatoes; you’ll need 175g of it. Run the potatoes through a potato ricer, or mash thoroughly until there are no lumps. Measure out 130g of the mashed potato. Let both the potato and the potato water cool fully overnight.
- Depending on your starter’s strength and your kitchen’s temperature, feed a ratio fitting for the environment. My kitchen is around 70F overnight, so I feed my starter a 1:3:3 ratio. An example of that would be 25g starter : 75g water : 75g flour, this gives you a total of 175g of starter at peak the next morning, you’ll use 125g for the recipe and have 50g left over to go back in the fridge.fastest. 50g starter : 50g water : 50g flour.
Next Morning
- Place the cold potato water, cold mashed potato, active starter, egg, sugar or honey, bread flour, and salt into the bowl of a stand mixer fitted with a dough hook. Mix on medium speed for 5–7 minutes, until everything is well combined. Check your dough, if it looks too hydrated, add 25g of flour, or if it’s too stiff, add 10g-15g of water because depending on the type of potato used and humidity, you may need to add more flour or more water. It should be a firm dough.With the mixer still running, add the soft butter one tablespoon at a time, waiting for each addition to be fully incorporated before adding the next. This whole process — from the start of mixing to the last of the butter going in — takes roughly 10-15 minutes total.You’ll know the dough is ready when it’s smooth, light, and glossy, and it’s pulling cleanly off the sides of the bowl to wrap around the hook.
- Transfer the dough to a straight-sided container — a measuring bowl or dough bucket works well — and pat it down flat. Note where the dough sits so you can track its rise later. Check the internal temperature with an instant-read thermometer. If it’s over 85°F, pop it in the fridge for about an hour to bring it back down before moving on.
- Perform two sets of stretch and folds, spaced about 40 minutes apart. This builds strength and structure in a dough that’s too soft and enriched to knead by hand for long.After the second set, let the dough continue to rise at room temperature until it has increased in volume by about 50%.
- Once the dough has risen by about 50%, cover the container and move it to the fridge for a cold ferment of 8 to 24 hours. If skipping cold ferment, once the dough reaches a 50% rise proceed to step 7.
- Turn the dough out onto a lightly floured surface. Flatten it into a rectangle or use a rolling pin, oriented sideways in front of you. Fold the left and right sides in toward the center so the width matches the length of your loaf pan, then roll the dough up snugly from the bottom, keeping the tension even as you go.Place the shaped dough seam-side down into a lined and greased 9×4-inch loaf pan.
- Cover the pan and let the dough proof at room temperature until it has doubled in size. The dough should be visibly domed above the rim of the pan, and it should feel airy and slightly springy, not tight, when you gently press it.
- Bake at preheated 375°F for 40-45 minutes, until the internal temperature reads between 198°F and 205°F on an instant-read thermometer. Because this dough has more sugar and richness than a lean sourdough loaf, keep an eye on the crust color in the last 10 minutes — tent it loosely with foil if it’s browning faster than the inside is finishing.
- As soon as it comes out of the oven, remove the loaf from the pan and brush the top generously with butter — this softens the crust and adds a beautiful sheen and flavor. Remove the pan liner and cool the loaf completely on a wire rack before slicing.
