The Best Sourdough Discard Chocolate Chip Cookies (Brown Butter)
The Cookies That Changed Everything
I’ve made a lot of chocolate chip cookies in my life. Hundreds, probably. Classic Toll House, the NYT famous ones, the brown butter versions, the overnight dough versions. I thought I knew what my “perfect cookie” looked like. And then I accidentally made these.
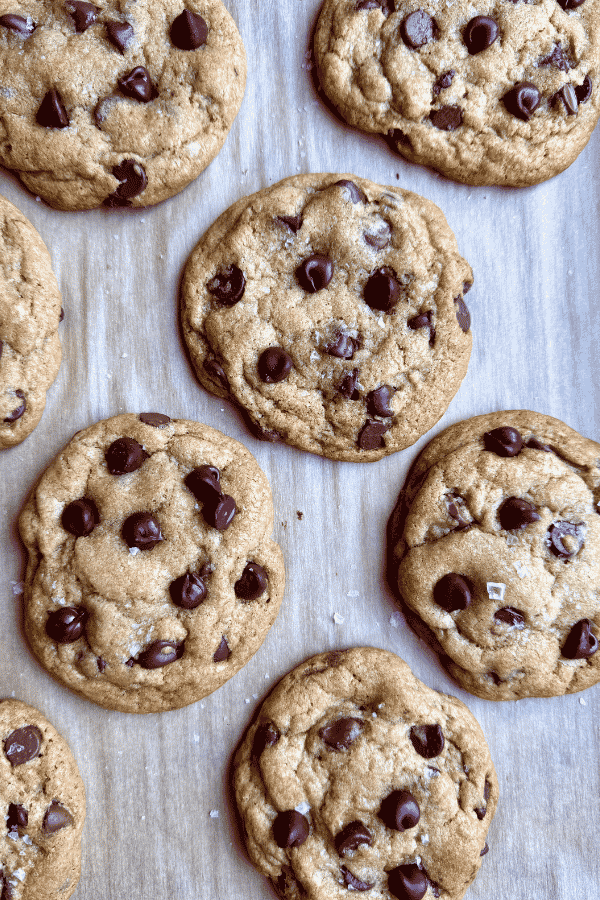
It was a Tuesday — the kind where you don’t feel like baking bread but you also can’t bring yourself to throw away the discard sitting in your fridge. I had softened butter on the counter, a jar of sourdough discard, and a very strong craving. An hour later, my kitchen smelled like toasted hazelnuts and caramel, and I was standing over the cooling rack doing what I can only describe as a spiritual experience.
These sourdough discard chocolate chip cookies with brown butter aren’t just a good way to use up your discard. They are legitimately, life-alteringly good cookies. The brown butter adds a toasty, almost toffee-like depth that you’ll never want to bake without again. The sourdough discard makes the dough silkier, the texture more complex, and the chocolate taste more chocolatey. And that crispy edge giving way to a glossy, molten center? I’m going to stop before I embarrass myself.
Whether you’re swimming in sourdough discard or you’ve been saving a little jar of it in your fridge just waiting for the right reason — this is the right reason.
What Makes These the Best Sourdough Discard Chocolate Chip Cookies?
If you’re new to sourdough baking, “discard” is simply the portion of your starter you remove before feeding it. It’s not waste — it’s one of sourdough baking’s best-kept secrets. Discard is naturally fermented, meaning it’s been sitting and developing flavor over time. That fermentation is magic in baked goods like these cookies: it adds a subtle tang that rounds out sweetness, encourages a silkier crumb structure, and interacts beautifully with chocolate and vanilla to make everything taste more complex.
Now add brown butter to that picture. Browning butter is the act of cooking it past the melting point until the milk solids turn golden and fragrant — releasing a rich, nutty aroma that tastes somewhere between caramel, toasted walnut, and pure joy. It’s one of the highest-ROI techniques in all of baking. Four extra minutes. Life-changing results.
Together, these two ingredients create a chocolate chip cookie that doesn’t taste like it has sourdough in it — it just tastes better than any other cookie you’ve made. Deeper, richer, more layered. Bakery-level, without the bakery prices.
Why You’ll Love This Recipe
- That flavor. Brown butter plus sourdough discard creates a depth of flavor that regular cookie dough simply can’t match — nutty, caramel-forward, and complex without being weird.
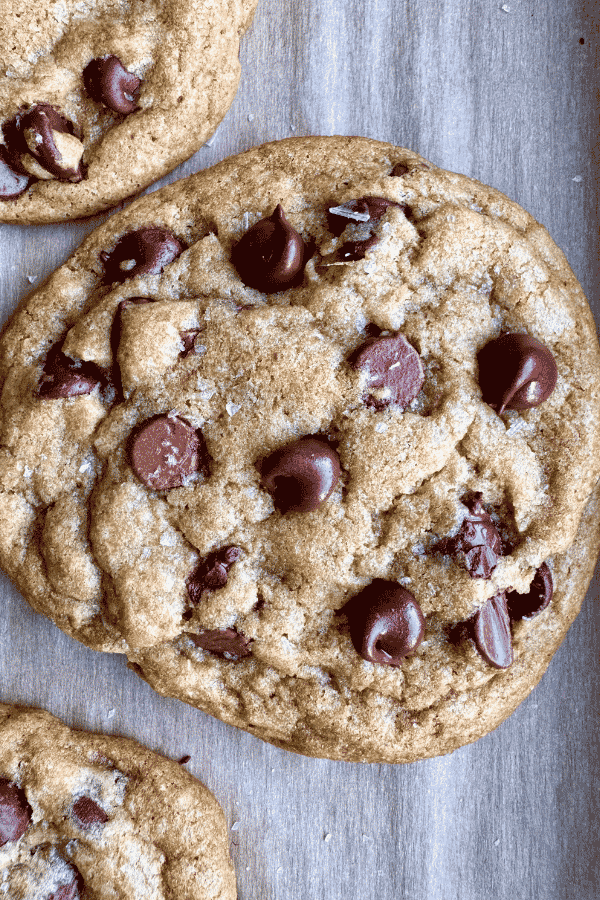
- Perfect texture every time. Crisp, golden edges. Chewy, slightly gooey center. A slight crinkle on top that makes the cookie look like it came from a very fancy jar with a ribbon on it.
- A genuinely great use for discard. No more guilt about throwing it away. This recipe uses ¼–½ cup of discard and transforms it into something you’ll be asked to make again immediately.
- No stand mixer required. A bowl, a whisk, and a spatula are all you need. This is a one-bowl situation and I refuse to apologize for how approachable that makes it.
- Flexible timing. The dough can be chilled for 30 minutes or up to 3 days in the fridge, meaning you can bake these on your schedule — not the recipe’s.
- Gut-friendly baking. Sourdough fermentation breaks down some of the gluten and phytic acid in flour, making these cookies a tiny bit easier on digestion than conventional ones. Is it a health food? No. But “chocolate chip cookie with a gut-friendly nudge” feels worth noting.
- Freezes beautifully. Baked cookies or raw dough balls — both freeze exceptionally well for whenever a cookie emergency strikes.
Ingredient Breakdown
Brown Butter (1 1/2 cups – 3 sticks / 340g butter)
This is where the magic starts. You’ll use good quality butter and brown it on the stovetop before building the rest of the dough. Use full fat European or Irish butter if you can. Browning the butter does two important things: first, it drives off the water in the butter (butter is about 18% water), which is crucial because sourdough discard already contributes moisture to the dough. Less water in the butter means less risk of a cakey, soft, spread-thin cookie. Second, it creates hundreds of new flavor compounds through the Maillard reaction — that toasty, nutty, caramel-y depth that makes people stop mid-bite and ask what you did differently.
Sourdough Discard (200g / 1 cup)
Your discard is your unfed refrigerated starter, one that hasn’t been sitting in the fridge for longer than a week since last feeding. You can definitely use an active starter as well. The older the discard, the more pronounced the tang. For most cookie lovers, younger discard (3–5 days old) gives a more balanced flavor.
A note on thickness: This recipe’s sourdough discard measurement is based on a starter that is fed equal amounts of water to starter, also called a 100% hydration starter. A thicker, stiffer discard will make the dough firmer — you may not need to adjust anything. A thinner, more liquid discard adds extra moisture so add 2 tablespoons of additional flour if you are using discard that is runny like buttermilk.
All-Purpose Flour (550g / 4 cups, spooned and leveled)
Standard all-purpose flour gives these cookies just the right structure — enough to hold their shape without becoming dense or cakey. I have used bread flour also, and they turned out great. Spoon the flour into your measuring cup rather than scooping; scooping packs flour and can add up to 20–30 extra grams without you realizing it, which will make the cookies dry. I specifically use a scale to measure the 550g of flour as I’ve found that plus or minus any amount results in spread out cookies or not spreading out enough.
Brown Sugar (375g / 2 cups, lightly packed) + Granulated Sugar (100g / ½ cup)
The combination of both sugars is intentional. Brown sugar is hygroscopic — it holds onto moisture — which gives the cookie its characteristic chew and keeps it soft for days. The molasses in brown sugar also deepens the color and adds a subtle caramel note that plays off the brown butter perfectly. The granulated sugar is there for crispness and spread control, giving the edges that satisfying crunch.
Dark brown sugar makes a bolder, more toffee-forward cookie. Light brown sugar is a little milder. Either works beautifully — use what you have.
1 Large Egg + 1 Egg Yolk (room temperature)
Using one whole egg plus an extra yolk is a technique worth understanding. Egg whites are mostly water and protein — they add structure but also moisture. Since our discard is already contributing moisture, we compensate by using just one white (from the whole egg) while adding an extra yolk for richness and fat. The result is a dough that bakes up dense and fudgy rather than puffy and cakey. Pull your eggs out of the fridge 30 minutes before baking, or warm them quickly in a bowl of room-temperature water.
Pure Vanilla Extract or vanilla paste (1 Tbsp / 20g)
Don’t skimp. Two teaspoons might feel like a lot, but sourdough discard has a subtle acidity that actually makes vanilla bloom more fully. The result is a cookie that smells deeply, warmly of vanilla in the best possible way. Use pure extract, not imitation — with all the other beautiful flavors in this dough, it’s worth it.
Baking Soda (2 tsp / 8g) + Corn Starch (4 tsp / 10g)
The combination of these two makes the cookies thicker, softer, and chewier while preventing excessive spreading. Baking soda also promotes browning on the bottom of the cookie, contributing to those gorgeous golden edges. The acid in the sourdough discard helps activate the baking soda — another reason the two work so well together.
Coarse Salt (2 tsp / 6g) + Flaky Salt for Finishing
Salt is not optional. It’s doing serious work here: balancing the sweetness, amplifying the chocolate, and making the brown butter’s nuttiness sing. The teaspoon goes into the dough. Then — and this matters — a pinch of flaky sea salt (Maldon, Fleur de Sel, whatever you have) goes on top of each dough ball just before baking. That little salty crunch on top of each warm, gooey cookie is a religious experience.
Chocolate (350g / about 2 cups +)
Use a good-quality chocolate bar and chop it yourself or good quality chips — a good combo is half milk chocolate and half dark or semi-sweet. Chopped chocolate creates uneven pieces that melt into “pools” and “puddles” throughout the cookie rather than maintaining chip shape. You get swirls of chocolate in every bite instead of just occasional chips.
Step-by-Step Directions
Step 1: Brown the Butter
Place your cut up butter in a light-colored or stainless steel saucepan or skillet over medium heat. (Light-colored is important — you need to see the color of the milk solids as they change.) Let it melt completely, once it’s melted and starts bubbling and simmering, lower the heat to low and continue cooking. The butter will bubble and foam, which is the water cooking off. Keep going. Eventually the foam will subside slightly and you’ll see golden-brown specks beginning to appear on the bottom of the pan. The smell will shift from regular melted butter to something nutty, caramel-like, almost like toasted cookies.
When the specks are a deep amber (not light gold, not dark brown — think the color of a hazelnut) and the smell is deeply nutty, pull it off the heat immediately. Pour it — every last browned bit — into a large heatproof mixing bowl (stand mixer bowl if using mixer). Those brown bits scraped from the bottom are where the flavor lives.
Let the brown butter cool for about 30 min until it’s barely warm to the touch.
💡 Pro Tip: Total time from cold butter to finished brown butter is usually 10-20 minutes depending on your stove. Don’t walk away. The window between perfectly brown and burned is narrow, and burned butter smells nothing like toasted cookies.
⚠️ Watch Out: If the specks go from amber to dark brown quickly, remove immediately and pour into your bowl — the residual heat in a hot pan will keep cooking it.
Step 2: Mix the Sugars Into the Brown Butter
Add both the brown sugar and granulated sugar to the brown butter. Whisk vigorously until combined — the mixture will look like wet, grainy sand. This step isn’t just about mixing; whisking the sugars into the warm butter helps dissolve the sugar slightly, which contributes to a shinier, more crinkled top on your finished cookie. If using a stand mixer, use the paddle attachment to just mix on medium low speed for a couple minutes.
Step 3: Add the Eggs, Vanilla, and Discard
Add your whole egg and whisk until fully incorporated, then add the egg yolk and whisk again. The mixture will become glossy and smooth. Add the vanilla extract and whisk to combine. Finally, add your sourdough discard and whisk until everything is fully combined and the mixture looks silky and uniform. If using a stand mixer, mix on low speed just until each ingredient is incorporated so as not to overmix.
💡 Pro Tip: This is the moment to take stock of your discard’s consistency. If it’s runny enough to pour easily, you may need an extra tablespoon or two of flour later. If it’s thick and paste-like, you’re right on track.
Step 4: Add the Dry Ingredients
In a separate small bowl, whisk together the flour, baking soda, corn starch and salt. Add half of this to the wet ingredients and fold in until just combined — add the rest of the flour mixture and fold it in, a few streaks of flour are fine. Overmixing develops gluten, which makes cookies tough. Stop when the dough comes together and no large pockets of dry flour remain. If using a stand mixer, use low speed for just a couple of turns like pulsing.
⚠️ Watch Out: It is best to fold gently with a spatula. The dough will look a little shaggy at first — keep folding and it will come together.
Step 5: Fold in the Chocolate
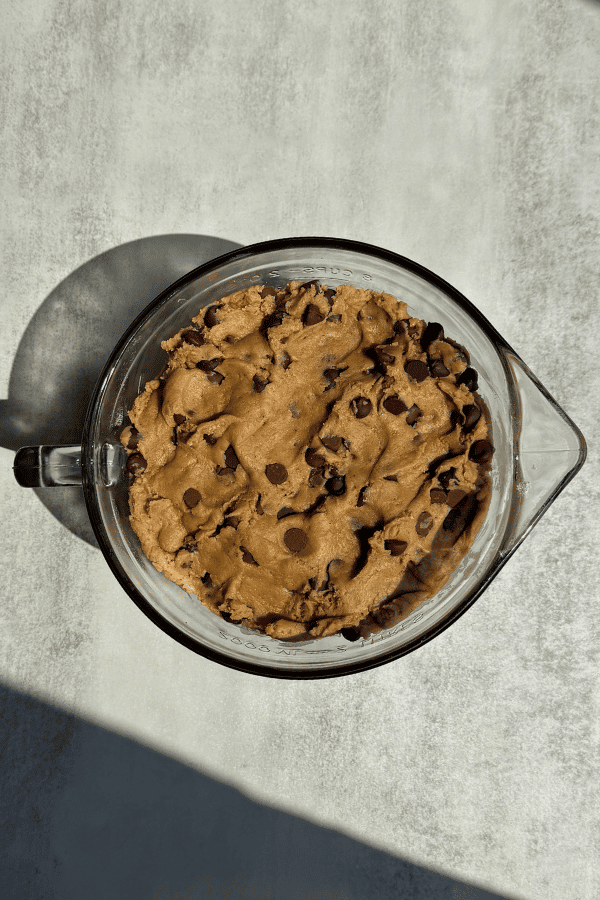
Add your chopped chocolate (or chips) and fold until evenly distributed. I usually fold the chocolate in using my hand. The dough will be soft and slightly tacky — this is correct. Transfer to a smaller bowl to fit in the refrigerator.
Step 6: Chill the Dough
Cover the bowl tightly with plastic wrap or a lid and refrigerate for at least 8 hours. Chilling firms up the butter and flour, which controls how much the cookies spread in the oven. Chilling also allows the sourdough discard to continue its gentle fermentation in the dough — you can bake after 2 hours in the fridge, but I like to give it 8-16 hr cold fermentation to allow the gluten in the flour to break down and the dough to ferment for not only better flavor, but more gut healthy bacteria and easier to digest gluten.
💡 Pro Tip: For the absolute best flavor and texture, chill overnight (up to 36 hours). The brown butter becomes more pronounced, the chocolate flavors deepen, and the cookie develops that impossible-to-replicate complexity you get from good bakery cookies.
Step 7: Scoop and Shape
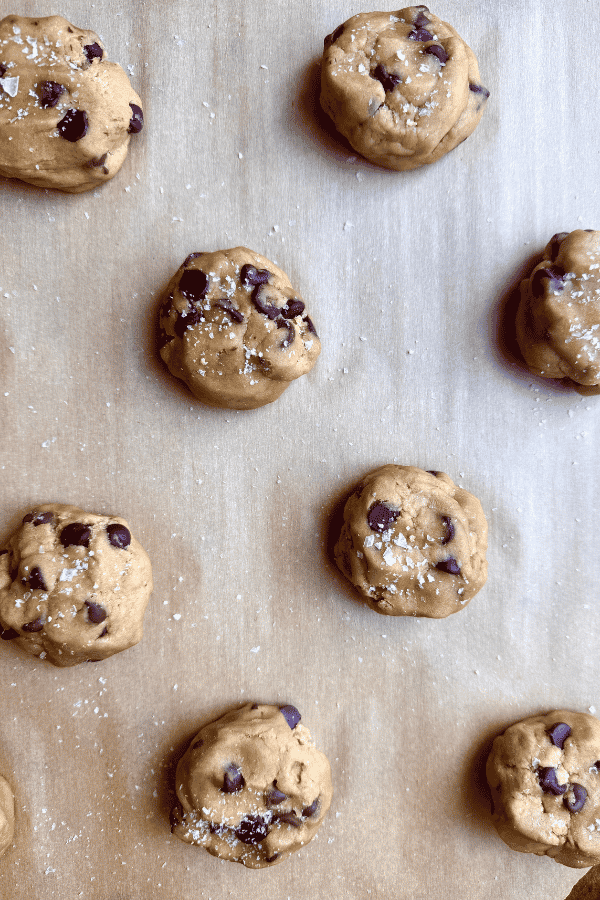
Take your bowl of dough out of the fridge and let come to room temp for 1-2 hours so it is easier to scoop. Preheat your oven to 350°F (176°C). Line two baking sheets with parchment paper. Scoop the chilled dough into balls using a medium cookie scoop — roughly 2 tablespoons (about 60g) per cookie. For thick, bakery-style cookies, shape each ball so it’s slightly taller than it is wide (a cylinder rather than a perfect sphere). This encourages the cookie to spread up and out rather than pancaking flat.
Place dough balls about 2 inches apart from each other — these will spread, and they need space to do it without merging.
Sprinkle each dough ball with a small pinch of flaky sea salt.
Step 8: Bake
Bake for 15 minutes, rotating the pan halfway through. The cookies are done when the edges are golden and set but the centers still look underdone and slightly glossy. This is crucial — they will continue cooking on the hot pan for several minutes after you pull them from the oven. If you wait until the centers look done in the oven, the cookies will be overdone by the time they cool.
⚠️ Watch Out: Every oven runs differently. Start checking at 12 minutes if your oven runs hot. The tell is the edges — when they’re golden and the cookie has puffed and crinkled across the top, it’s time.
Step 9: The Patience Part (Sort Of)
Let the cookies cool on the baking sheet for at least 5 minutes before moving them to a cooling rack. They’re too fragile right out of the oven to transfer without falling apart. At 5 minutes they’ll have set enough to move to a wire rack — though eating one straight off the pan at minute 7 is not something I can legally stop you from doing.
How to Store & Freeze Your Brown Butter Sourdough Discard Cookies
Room Temperature
Store cooled cookies in an airtight container at room temperature for up to 5 days. The sourdough discard and brown sugar work together to keep these cookies softer longer than a conventional chocolate chip cookie. A slice of bread tucked into the container will keep them even moister (the bread sacrifices its moisture so the cookies can keep theirs — yes, this actually works).
Refrigerator
You can refrigerate baked cookies, but it’s not ideal — cold tends to make them taste a little flat and can firm the chocolate unpleasantly. If you must refrigerate, bring them to room temperature before eating or warm for 15–20 seconds in the microwave.
Raw dough in the fridge: Scooped dough balls keep beautifully for up to 3 days, so you can bake fresh cookies on demand all week. This is one of the best things about this recipe.
Freezer
Baked cookies: Cool completely, then freeze in a single layer on a parchment-lined sheet until solid (about 1 hour). Transfer to a zip-close freezer bag or airtight container. Freeze for up to 2 months. To thaw, leave at room temperature for 30–60 minutes or warm in a 300°F oven for 5–8 minutes until the chocolate is gooey again.
Unbaked dough balls: The best method for cookie emergencies. Freeze scooped, unsalted dough balls in a single layer, then transfer to a bag. Freeze for up to 3 months. Bake from frozen at 350°F for 15-18 minutes (no need to thaw). Add the flaky salt right before they go in the oven.
Troubleshooting
Problem: My cookies spread too thin and came out flat. Why it happened: The butter was too warm when you added the sugars, the dough wasn’t chilled enough, or your discard was thin/runny and added extra moisture. Fix it: Make sure brown butter cools to warm-but-not-hot before mixing. Chill the dough for at least 30–60 minutes before scooping. If your discard is very liquid, add an extra 2 tablespoons of flour to the dough. Also make sure your baking sheets aren’t still warm from a previous batch — always start with a room-temperature pan.
Problem: My cookies came out cakey and puffy, not chewy. Why it happened: Too much flour, the dough was over-mixed, or you used two whole eggs instead of one egg plus one yolk. Fix it: Weigh out the flour on a scale instead of cups. Fold — don’t whisk — the dry ingredients in. Double-check you used the egg + yolk combination. And if your oven runs hot, try lowering the temperature by 10–15°F next time and pulling the cookies earlier.
Problem: The cookies taste sour or overpowering — not in a good way. Why it happened: The discard was too old and too acidic, or you used more than the recipe calls for. Fix it: Use discard that’s no more than 5–7 days old for a balanced flavor. Younger discard (2–4 days) is even milder and works beautifully here. If you’re working with particularly tangy discard, reduce the amount by a couple tablespoons and compensate with a tablespoon of milk.
Problem: The cookies look done on top but are raw and doughy underneath. Why it happened: The oven temperature was too high, baking too fast on the surface before the center could cook. Fix it: Use an oven thermometer — many ovens run 25–50°F hotter than the dial reads. Lower the temperature by 10–15°F and bake slightly longer. Also make sure you’re baking on the center rack, not too close to the top.
Problem: The brown butter burned before I could catch it. Why it happened: It happens — high heat and a moment of distraction are a rough combination. Fix it: Start over with fresh butter. Burned butter is bitter and will ruin the batch. Next time, use medium (not medium-high) heat, a light-colored pan so you can see the color change, and stay close to the stove. The good news: brown butter is quick to make, so starting over only costs 8 minutes.
Frequently Asked Questions
Do brown butter sourdough discard chocolate chip cookies taste like sourdough? No — and this surprises a lot of people. The sourdough discard doesn’t make these cookies taste tangy or sour. What it does is add moisture, a silkier texture, and a subtle complexity that deepens the chocolate and vanilla flavors without announcing itself. Friends who are skeptical of sourdough baking eat these and can’t put their finger on what makes them so good. That’s the whole point.
Can I use active sourdough starter instead of discard? Yes, you can. Active starter that’s been recently fed and is at or near peak will work in place of discard. The flavor will be slightly milder and less complex, since active starter hasn’t had as long to develop. The cookies will still be excellent — just a touch less nuanced.
Can I skip browning the butter and just use melted butter? You can, and the cookies will still be good. But “good” is a step down from “extraordinary,” and with only 6–9 extra minutes of effort, I’d encourage you to try the brown butter at least once. Melted butter (without browning) will also make the cookies slightly more prone to spreading and a little softer — not bad, just different. The brown butter’s water-reduction also helps with chew, so skipping it may make the cookies slightly cakier.
How long can I keep the raw dough in the fridge before baking? The scooped dough balls keep well in the refrigerator for up to 3 days. Many bakers find the flavor actually peaks at the 24–48 hour chill mark — the brown butter becomes more pronounced and the whole dough develops a deeper, more caramel-like flavor. After 3 days, the cookies will still be good but the discard’s tang can start to become more assertive.
My discard is different thicknesses each time I use it — how does that affect the recipe? Great question, and one most recipes skip entirely. Discard hydration varies based on how you feed your starter (flour-to-water ratio), how long it’s been in the fridge, and whether it’s separated and was stirred back together. Thicker discard behaves more like a paste and contributes less additional moisture — your dough will be stiffer. Thinner discard behaves more like a liquid and adds more moisture — your dough may be softer and stickier. If the dough feels too loose to hold its shape when scooped, add flour a tablespoon at a time until it holds. If it feels unusually stiff, add a teaspoon of milk or water at a time until it comes together.
Can I make these cookies without chilling the dough? You can bake them straight from the bowl if you’re in a hurry — reduce the oven temperature to 350°F and expect slightly thinner, more spread cookies. For the best texture and flavor, though, even 30 minutes of chilling makes a meaningful difference. Overnight is where these cookies truly become what they’re meant to be.
A Few Final Words
These brown butter sourdough discard chocolate chip cookies are the kind of recipe that earns a permanent spot in your rotation — not because they’re a clever way to use up discard (though they are), but because they are genuinely, objectively delicious cookies. The kind that disappear from the cooling rack before they’re fully cooled. The kind your family texts you about on a Wednesday. I have baked these and taken to many a gathering – always received with ooohs and aaahs.
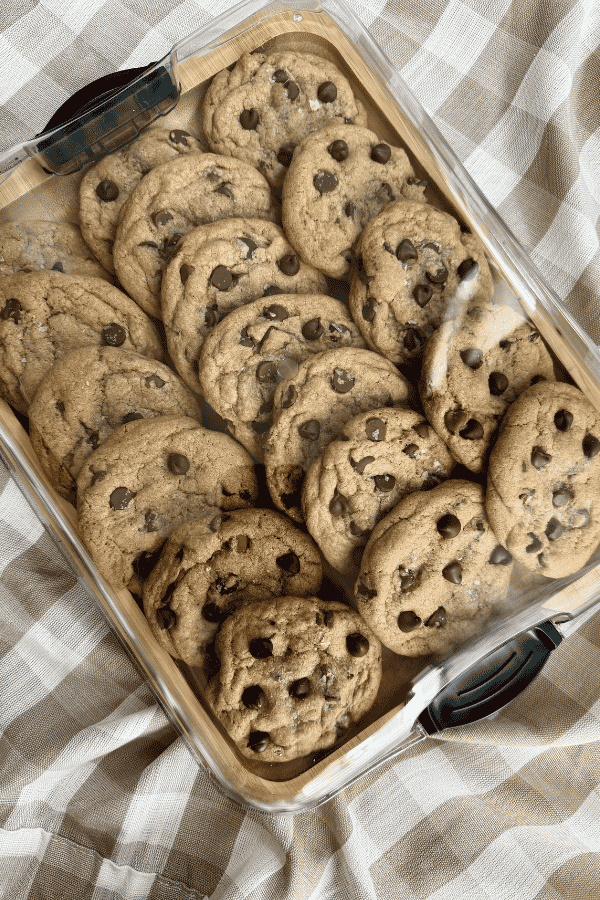
If you try them, I’d love to hear how they turned out. And if this is your first time baking with sourdough discard, welcome to the best side effect of sourdough baking. It only gets better from here.
The Best Sourdough Discard Chocolate Chip Cookies (Brown Butter)
Ingredients
Method
- STEP 1 — Brown the Butter
- Place cut butter in a light-colored or stainless steel saucepan over medium heat. Let it melt completely. Once melted and bubbling, reduce heat to low. The butter will foam as the water cooks off — keep going. When golden-brown specks appear on the bottom and the aroma shifts to nutty and caramel-like, remove from heat immediately. Pour every last bit (including the browned specks) into a large heatproof bowl. Cool for about 30 minutes until barely warm to the touch.
- ⚠️ Watch Out: If the specks darken quickly, pull the pan off the heat immediately — residual heat will keep cooking it.
- STEP 2 — Mix the Sugars Into the Brown Butter
- Add both sugars to the cooled brown butter. Whisk vigorously until combined — the mixture will look like wet, grainy sand. This step helps dissolve the sugar slightly and contributes to a shinier, crinkled top on your finished cookie. (Stand mixer: paddle attachment, medium-low, 2 minutes.)
- STEP 3 — Add Eggs, Vanilla & Discard
- Add the whole egg and whisk until fully incorporated. Add the egg yolk and whisk again until glossy and smooth. Add the vanilla extract and whisk to combine. Finally, add the sourdough discard and whisk until the mixture is silky and uniform.
- 💡 Pro Tip: Check your discard’s consistency here. If it pours easily like buttermilk, you may need an extra tablespoon or two of flour later.
- STEP 4 — Add the Dry Ingredients
- In a separate bowl, whisk together flour, baking soda, cornstarch, and salt. Add half the flour mixture to the wet ingredients and fold gently with a spatula until just combined. Add the remaining flour mixture and fold until no large pockets of dry flour remain — a few small streaks are fine. Do not overmix.
- ⚠️ Watch Out: Fold, don’t whisk. The dough will look a little shaggy at first — keep folding and it will come together.
- STEP 5 — Fold in the Chocolate
- Add chopped chocolate or chips and fold until evenly distributed throughout the dough. The dough will be soft and slightly tacky — this is correct.
- STEP 6 — Chill the Dough
- Cover the bowl tightly with plastic wrap or a lid and refrigerate for at least 8 hours, up to 36 hours. Overnight is strongly recommended for best flavor and texture.
- 💡 Pro Tip: The longer the chill, the more pronounced the brown butter flavor becomes and the more complex the cookie. 24–36 hours is the sweet spot.
- STEP 7 — Scoop and Shape
- Remove dough from the fridge and let sit at room temperature for 1–2 hours until scoopable. Preheat oven to 350°F (176°C). Line two baking sheets with parchment paper. Scoop dough into balls of approximately 60g (about 2 tablespoons) each. Shape each ball slightly taller than it is wide — this encourages the cookie to spread up and out rather than going flat. Place 2 inches apart on prepared baking sheets. Sprinkle each ball with a small pinch of flaky sea salt.
- STEP 8 — Bake
- Bake for 15 minutes, rotating the pan halfway through. The cookies are done when the edges are golden and set but the centers still look slightly underdone and glossy. They will continue to cook on the hot pan after you remove them from the oven — do not wait for the centers to look fully set.
- ⚠️ Watch Out: Every oven runs differently. Start checking at 12 minutes if yours runs hot. Golden edges + crinkled, puffed top = ready.
- STEP 9 — Cool
- Let cookies cool on the baking sheet for at least 5 minutes before transferring to a wire rack. They're too fragile straight from the oven to move without falling apart.
