Pumpkin Spice Sourdough Bread with Raisins (Soft Sandwich Loaf)
There’s a specific kind of cold that shows up in my kitchen sometime in late September — the kind where the windows fog up a little from the oven, and the whole house smells like someone lit a candle called “Autumn Porch.” I don’t light candles. I just bake this pumpkin spice sourdough bread, and somehow it does the same job, except you can eat it.
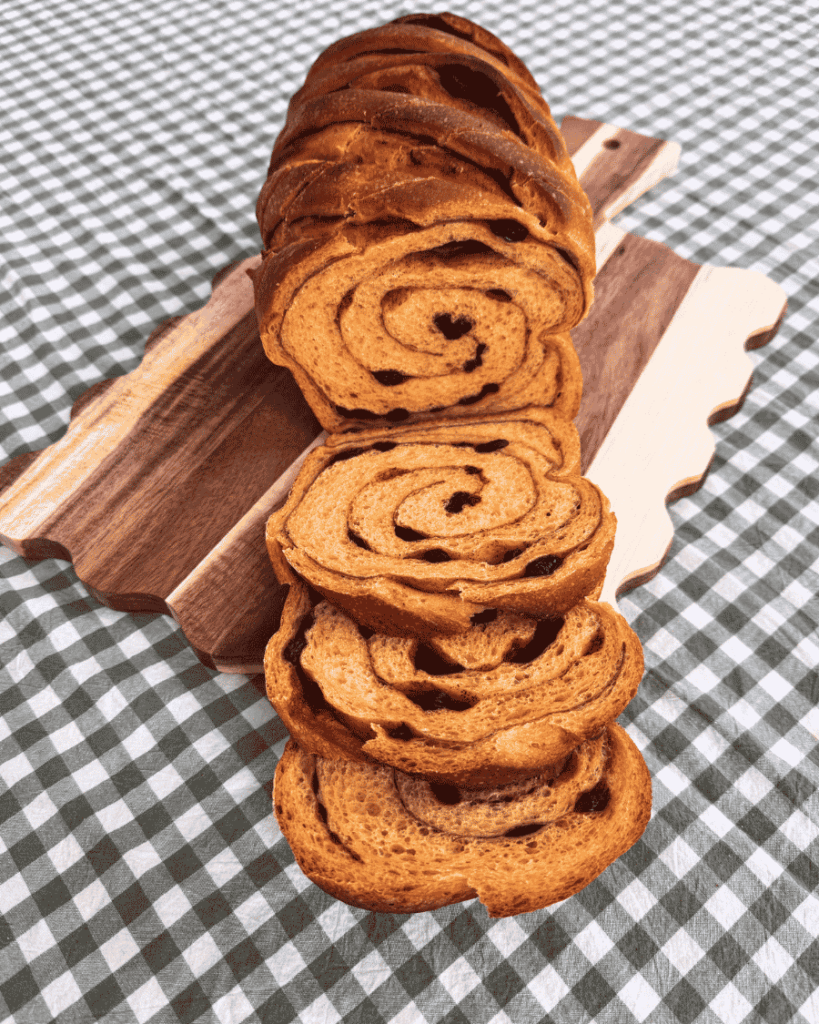
I built this loaf because I wanted a pumpkin bread that was soft, enriched, like a danish. Every pumpkin sourdough I’d made before this one was too rustic. This one goes in a loaf pan and comes out tall, soft, faintly orange, and swirled through with pumpkin spice and raisins in every slice. It toasts beautifully. It holds up under butter, jam, or a fried egg if you’re feeling bold. And it tastes like fall without tasting like a candle.
If you’ve got an active sourdough starter and a loaf pan, you have everything you need to make this happen.
What Is Pumpkin Spice Raisin Sourdough Bread?
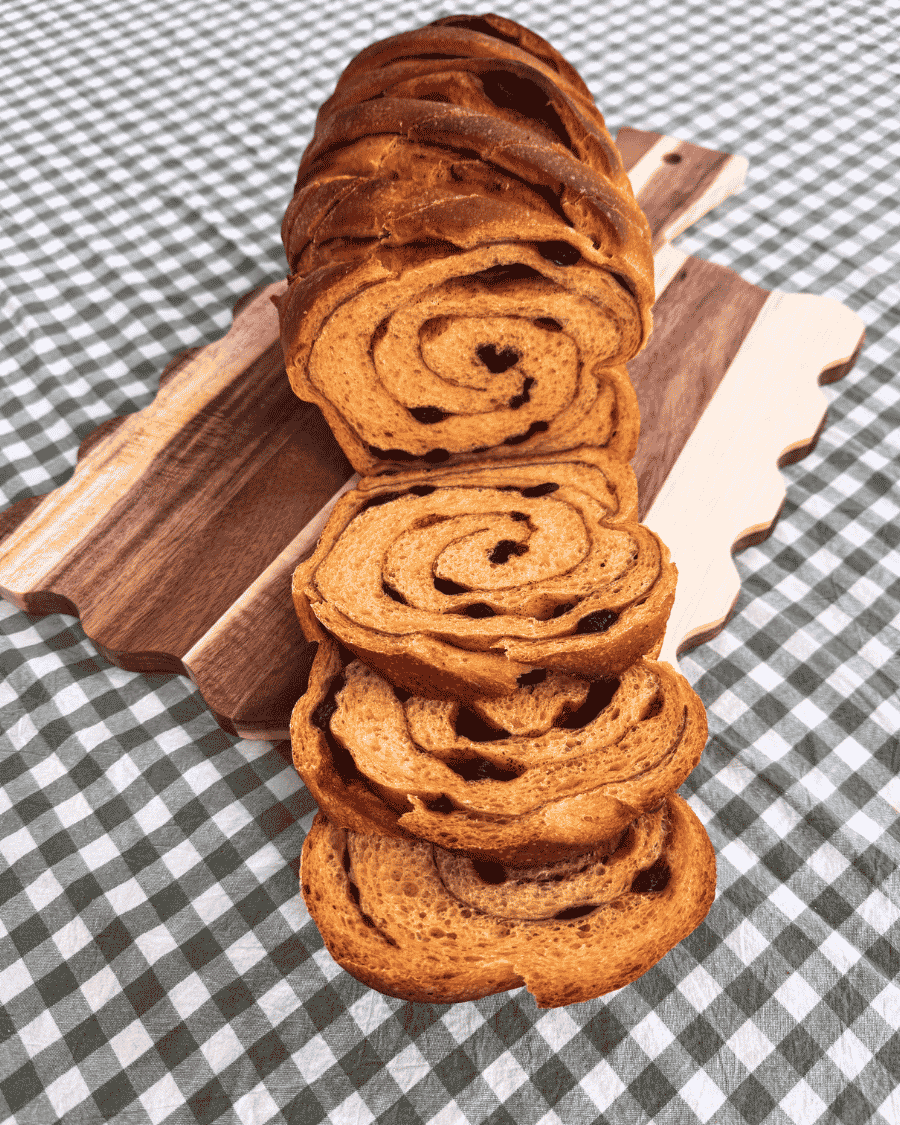
This is an enriched sourdough sandwich loaf — meaning the dough gets butter and a little maple syrup worked in, which gives you a softer, more tender crumb than a lean, crusty artisan loaf. Canned pumpkin puree does double duty here: it adds moisture so the bread stays soft for days, and it tints the crumb a warm, dusty orange that looks like it belongs on a fall table even before you slice into the swirl.
Instead of the classic cinnamon-sugar swirl you’ll see in most pumpkin sourdough recipes, this one uses pumpkin spice blend and raisins rolled through the dough during shaping. You get little ribbons of spice and pockets of sweet, chewy raisin in nearly every bite, rather than one concentrated seam of sugar down the center. It’s less like a cinnamon roll and more like a proper sandwich bread that happens to taste like autumn.
Because it’s baked in a standard loaf pan rather than shaped free-form as a boule, this is one of the more forgiving sourdough bakes you’ll try — the pan does a lot of the shape-holding work for you.
Why You’ll Love This Pumpkin Spice Sourdough Bread
- It’s soft in a way pumpkin sourdough rarely is. Between the butter and the pumpkin puree, this crumb is plush and tender — not the dense, chewy bite you get from a lean boule. Tear into a warm slice and it practically pulls apart in ribbons.
- The color alone stops people mid-conversation. No food dye, just canned pumpkin doing honest work — a deep, dusty orange crumb studded with cinnamon-spiced swirls and jammy raisins in nearly every slice. Cut into it at a fall brunch and watch what happens.
- This is the loaf your toaster has been waiting for all September. Butter melts straight into the crumb, the spice blooms as it warms, and the edges go faintly crisp while the center stays soft. Add a fried egg or a smear of cream cheese and you’ve built a whole fall morning out of one slice.
- It bends to your actual schedule, not the other way around. Want warm bread by lunch? Use the same-day discard-and-yeast method. Have the weekend to spare and want deeper, tangier flavor? Give it the full active-starter route with an overnight cold ferment. Same loaf, same swirl, two very different mornings.
- It smells like the inside of a bakery that only exists in October. Warm spice, toasted sugar, browning butter — your kitchen will smell like this before the loaf even finishes baking.
Ingredient Breakdown
A quick note before we get into it: every ingredient here is listed by weight (grams) because that’s the accurate, repeatable way to bake — but I’ve included the volume measurement next to each one for anyone still building out their kitchen scale collection.
- 165 g (about ⅔ cup) cold water — Cold water helps keep the dough’s temperature in check once the mixer starts working and generates friction heat, which matters more in an enriched dough like this one than in a lean loaf.
- 130 g (about ½ cup, packed) canned pumpkin — This is where your color and moisture come from. Use plain canned pumpkin puree, not pumpkin pie filling, which is pre-spiced and pre-sweetened and will throw off both flavor and hydration.
- 125 g (about ½ cup) sourdough starter, at peak — Your leavening. See the starter section below for exactly what “at peak” looks like and how to time this without stress.
- 30 g maple syrup (about 1½ Tbsp) or honey — Adds a soft, rounded sweetness and helps with browning. Either one works; maple syrup leans slightly more toward the fall flavor profile if you want to lean in.
- 435 g (about 3½ cups) bread flour — Bread flour’s higher protein content gives this enriched dough the structure it needs to hold up under the butter and pumpkin without going slack. All-purpose flour will work in a pinch, but expect a slightly softer, less chewy crumb.
- 10 g salt (about 1½ tsp) — Don’t skip or reduce this. Salt isn’t just flavor here — it also helps regulate fermentation speed.
- 40 g unsalted butter, softened (about 3 Tbsp) — This is what makes the crumb soft and tender rather than chewy and rustic. It goes in gradually, after the rest of the dough has already come together (more on why in the directions).
- 2 Tbsp pumpkin spice (or cinnamon, if that’s what’s in your pantry) — This gets sprinkled into the swirl during shaping, not mixed into the dough itself, so you get distinct ribbons of spice rather than a uniformly spiced loaf.
- ⅔ cup raisins — Regular or golden raisins both work beautifully. If your raisins are on the dry, leathery side, give them a quick soak in warm water for 10 minutes and pat them dry before using — plump raisins distribute more evenly and won’t pull moisture out of your dough.
- Optional: 1/2 tsp instant yeast — Only needed if you’re using the same-day hybrid method below. Not part of the standard active-starter version of this recipe.
Step-by-Step Directions
Same-Day Hybrid Option: Discard + Instant Yeast
Don’t have a full day (or an active starter ready to go) but still want this bread today? You can build this loaf using discard and a measured amount of instant yeast instead of the overnight active-starter method below.
Swap the 125 g active starter at peak for sourdough discard, straight from the jar — it doesn’t need to be fed or bubbly for this version. Add 1/2 tsp instant yeast directly into the flour when you mix the dough in Step 2, then skip Step 1 entirely as well as cold fermentation. If you don’t have 125g of discard, you can use as little as 50g plus 1 tsp instant yeast to make this work.
Because instant yeast leavens far faster and more predictably than starter alone, your bulk rise and final proof will both move noticeably quicker than the times referenced in Steps 3, 4, and 7 — plan on checking the dough closer to the front end of those windows rather than the back end. Skip the cold ferment in Step 5 altogether; once the dough hits that 50% bulk rise mark, go straight into shaping.
You’re still watching the dough itself rather than a fixed number of hours here — percentage rise is still your best gauge with this method, it’ll simply arrive sooner.
💡 Pro Tip: This hybrid version won’t develop quite the same depth of tang you’d get from an overnight active-starter rise, but you still get real discard flavor plus a fast, reliable rise from the yeast. It’s the version I reach for on a weekend morning when I want warm bread by lunch, not by suppertime.
Step 1: Feed Your Starter the Night Before
(Skip this step if using the same-day hybrid method above.)
Feed your starter the evening before you plan to mix, using roughly a 1:3:3 ratio (starter : water : flour) — for example, 25 g starter, 75 g water, and 75 g flour. That gives you a generous amount of starter to work with by the next morning, with extra left over to go back in the fridge for next time.
Here’s the thing most recipes won’t tell you: you don’t have to babysit this. Your fed starter can sit in the fridge for up to 3 days before you use it — no longer than that — which means you can prep it well ahead of a busy week and mix your dough whenever your schedule actually allows, not just whenever the recipe says to. Feeding it the night before and mixing the next morning simply gives you a full day to watch the rise and shape whenever it’s ready, rather than racing a clock.
You’ll know your starter is at peak and ready to use when the dome on top has leveled off and you can see gentle dimpling across the surface — like tiny craters forming as the bubbles below start to settle. That visual is far more reliable than any fixed number of hours, because your kitchen’s temperature will always have the final say over your starter’s timeline.
Step 2: Mix the Enriched Dough
The next morning, place the water, pumpkin, active starter, maple syrup, bread flour, and salt into the bowl of a stand mixer fitted with the dough hook. Mix on medium speed for 5–7 minutes, until everything comes together into a firm, cohesive dough.
With the mixer still running, add the softened butter one tablespoon at a time, waiting for each piece to fully disappear into the dough before adding the next. From the start of mixing to the last bit of butter going in, plan on this taking roughly 15–20 minutes total — enriched doughs like this one need the extra mixing time to develop the gluten structure that’ll hold all that butter and pumpkin without turning gummy.
You’ll know the dough is ready when it’s smooth, glossy, and pulling cleanly off the sides of the bowl to wrap around the hook, rather than sitting in a sticky puddle at the bottom.
⚠️ Watch Out: If you add the butter too quickly, the dough can look greasy and separated instead of glossy. If that happens, don’t panic — keep mixing on medium speed for another minute or two and it will almost always come back together.
Step 3: Start the Bulk Rise
Transfer the dough to a straight-sided container — a tall measuring bowl or a dedicated dough bucket both work well — and pat it down into an even layer. Mark or note where the top of the dough sits right now; you’ll use this as your reference point for tracking the rise.
Check the dough’s internal temperature with an instant-read thermometer. If it’s reading above 85°F (which can happen if your kitchen is warm or your mixer ran hot), pop it in the fridge for about an hour to bring it back down before moving on to stretch and folds. Enriched, sugar-heavy doughs like this one ferment fast, and starting too warm can push you toward over-proofing before you’ve even finished shaping.
Step 4: Stretch and Fold for Strength
Perform two sets of stretch and folds, spaced about 40 minutes apart. Because this dough is soft, enriched, and holding a lot of butter, it’s not one you’d want to knead by hand for an extended stretch — stretch and folds build the strength and structure you need without overworking it.
After the second set, let the dough continue rising at room temperature until it has increased in volume by roughly 50%.
💡 Pro Tip: This is a good moment to talk about the single biggest thing that trips up beginning sourdough bakers — bulk fermentation isn’t something you time, it’s something you watch. A flat “let it rise for 4 hours” instruction ignores the fact that your kitchen might run 65°F in October and 78°F in a warm apartment in September. Instead, track the rise as a percentage of the dough’s original volume, and let dough temperature — not the clock — tell you when to move to the next step. In a warm kitchen, or with dough sitting above 75°F, you’ll typically see that 50% mark (and later, full readiness) arrive faster and top out lower, closer to 75–80% total rise. In a cooler kitchen, or dough sitting below 70°F, fermentation slows down and the dough can safely rise well past that — sometimes 100% or more — before it’s ready. Same dough, same recipe, genuinely different timelines depending on the room it’s sitting in and the temperature of the dough.
Step 5: Cold Ferment (Optional but Recommended)
Once the dough has risen by about 50%, cover the container and move it to the fridge for a cold ferment of 8 to 24 hours. This slows fermentation way down, deepens the flavor, and — as a bonus — makes the dough easier to handle when it’s time to shape, since cold enriched dough is far less sticky than room-temperature dough.
If you’re short on time and want to skip the cold ferment entirely, that’s completely fine — once the dough hits that 50% rise, go ahead and move straight to shaping.
Step 6: Shape the Pumpkin Spice Raisin Swirl
Turn the dough out onto a lightly floured surface. Flatten it into a rectangle — a rolling pin makes quick work of this — oriented so the long side runs left to right in front of you. Spray the surface with some water lightly so the seasoning sticks better and the layers don’t separate during baking.
Sprinkle a layer of pumpkin spice and raisins evenly over the surface. Fold the left and right edges in toward the center so the resulting width matches the length of your loaf pan, spray with water, then sprinkle another layer of pumpkin spice and raisins over the top. Roll the dough up snugly from the bottom edge, keeping even tension as you go.
Place the shaped dough seam-side down into a lined and lightly greased 9×4-inch loaf pan.
Step 7: Final Proof
Cover the pan and let the dough proof at room temperature until it has doubled in size. You’re looking for a loaf that’s visibly domed above the rim of the pan and feels airy and slightly springy when you press it gently with a fingertip — not tight and resistant, which usually means it needs more time.
Step 8: Score and Preheat
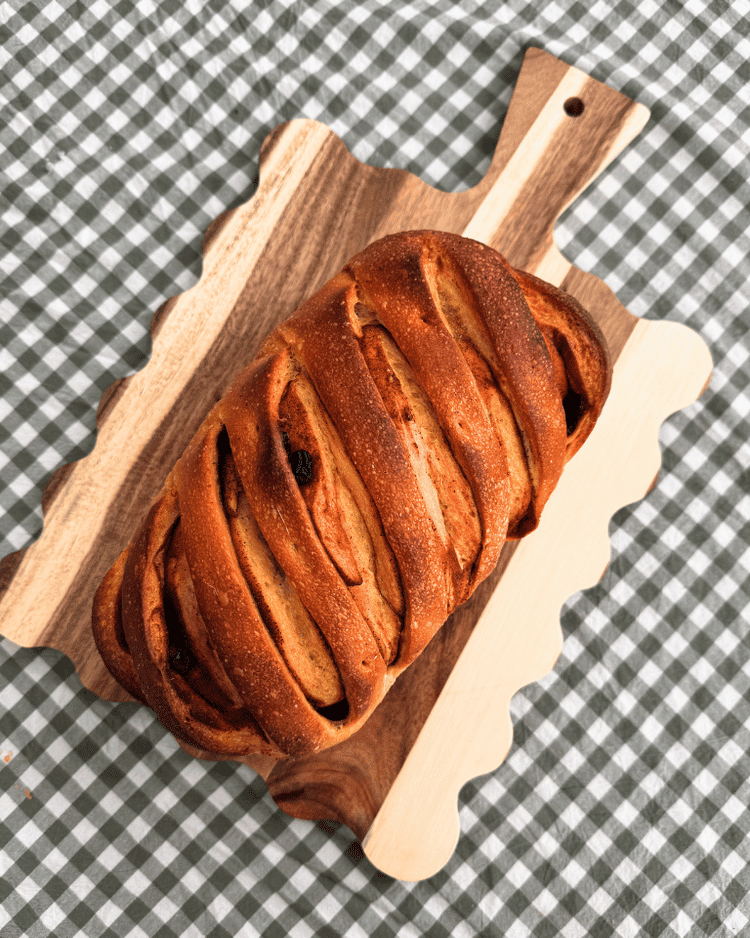
Preheat your oven to 375°F. Score the top of the loaf with a few deep slashes, about ½ inch deep, so the bread has somewhere controlled to expand as it bakes instead of splitting open wherever it pleases.
Step 9: Bake to the Right Internal Temperature
Bake for 40–45 minutes, until the internal temperature reads between 198°F and 205°F on a probe or instant-read thermometer inserted into the center of the loaf.
Because this dough carries more sugar and richness than a lean loaf, keep an eye on the crust color in the final 10 minutes of baking — if it’s browning faster than the inside is finishing, tent it loosely with a sheet of foil to slow the browning without stopping the bake.
Step 10: Cool and Slice
As soon as the loaf comes out of the oven, lift it from the pan using your parchment handles and brush the top generously with butter — this softens the crust, adds a beautiful sheen, and layers in even more flavor while the bread is still hot enough to absorb it.
Remove the parchment and cool the loaf completely on a wire rack before slicing. I know how tempting warm bread is, but slicing into this one too early will give you a gummy, compressed crumb instead of the soft, structured slices you’re after — the inside is still finishing its cooking as it cools.
How to Store & Freeze
Room temperature: Once fully cooled, store the loaf in a paper bag or wrapped in a clean kitchen towel for 2–3 days. Because this is an enriched dough with added moisture from the pumpkin, it stays soft longer than a lean sourdough loaf would, but the crust will soften over time — that’s expected, not a flaw.
Refrigerator: I don’t recommend refrigerating this loaf. The starches in bread actually go stale faster in the fridge than at room temperature, and with a soft, enriched crumb like this one, you’ll notice that dryness quickly. Room temperature or the freezer are your best options.
Freezer: Slice the cooled loaf before freezing so you can pull out individual pieces as you need them. Lay the slices flat in a single layer on a tray until frozen solid, then transfer them to a freezer bag or airtight container — this keeps them from fusing into one solid brick. Frozen slices keep well for up to 3 months. To thaw, let a slice sit at room temperature for 10–15 minutes, or pop it directly into the toaster from frozen for a quick, crisp-edged breakfast.
Troubleshooting
Problem: My swirl fell apart when I sliced the loaf, leaving big gaps around the raisins. Why it happened: The dough likely wasn’t rolled tightly enough during shaping, leaving air pockets between the layers, or the surface was over-floured before rolling, which prevents the layers from sealing to each other. How to fix it: Use only a light dusting of flour before rolling, and keep steady, even tension as you roll from the bottom edge up — think of tightening a rug, not just loosely folding fabric.
Problem: The bottom of my loaf came out dense and gummy, even though the top looked fully baked. Why it happened: This almost always means the loaf was pulled before it reached a true internal temperature of 198–205°F or it lightly underfermented. Visual cues like crust color can be deceiving on an enriched dough with a darker color from the pumpkin. How to fix it: Always confirm doneness with a probe thermometer inserted into the center of the loaf, not just crust color or a knock test. Underfermented – allow the dough to bulk rise more next time.
Problem: My dough felt way too sticky and slack to shape. Why it happened: Enriched doughs are naturally softer than lean sourdough, but a dough that’s genuinely unshapeable has usually over-fermented, either because the kitchen ran warm or the bulk rise went past the point the dough could hold structure. How to fix it: Chill the dough in the fridge for 20–30 minutes before attempting to shape — cold dough is dramatically easier to handle. Going forward, keep a closer eye on the percentage rise rather than a fixed time, especially in a warm kitchen.
Problem: The crust browned very fast, but the inside was still raw when I checked. Why it happened: The sugar content from the maple syrup, pumpkin, and raisins causes this dough to brown faster than a lean loaf, which can trick you into thinking it’s further along than it actually is. How to fix it: Tent the loaf loosely with foil once the crust reaches your desired color, and continue baking until the internal temperature hits 198–205°F, regardless of how dark the crust looks.
Problem: My raisins sank to the bottom of the loaf instead of distributing evenly. Why it happened: This is usually a rolling technique issue rather than a raisin issue — if the filling was piled unevenly, or the dough was rolled too loosely, gravity does the rest during proofing and baking. How to fix it: Spread the raisins and spice in a thin, even layer across the entire surface before rolling, and make sure your roll is snug from end to end so the filling has nowhere to migrate.
Frequently Asked Questions
Can I use fresh roasted pumpkin instead of canned? Yes, as long as it’s well-drained. Fresh roasted pumpkin holds more water than canned puree, and extra moisture in this dough can leave you needing more flour to compensate. If you go this route, strain your puree through a fine mesh sieve or cheesecloth for a few hours first.
Do I need a stand mixer to make this bread? A stand mixer makes incorporating the butter much easier, since it needs to be worked in gradually while the dough continues developing. You can mix this by hand, but expect it to take considerably longer and more effort to get the same smooth, glossy result.
Can I substitute all-purpose flour for bread flour? You can, and the loaf will still work, but expect a slightly softer, less structured crumb. Bread flour’s higher protein content is what helps this enriched dough hold its shape around all that butter, pumpkin, and fruit.
Can I make this loaf without raisins? Absolutely. Leave them out entirely for a plain pumpkin spice swirl loaf, or swap in dried cranberries, chopped dates, or toasted pecans for a different texture and flavor.
A Few Tools That Help
You don’t need a fully outfitted bakery to make this loaf, but a handful of tools make the process considerably more consistent:
- A 9×4-inch loaf pan — The specific size matters here for getting that tall, domed sandwich-loaf shape rather than a squat, wide one.
- Instant-read or probe thermometer — Non-negotiable for judging doneness accurately on an enriched, inclusion-heavy dough like this one.
- A stand mixer with a dough hook — Makes incorporating the butter far more manageable than mixing by hand.
- Measuring bowl — Makes it much easier to visually track the percentage rise during bulk fermentation.
- Bench scraper — Useful for handling this soft, enriched dough during shaping without it sticking to everything in sight.
Ingredients
Method
- Feed your starter: 25 g starter, 75 g water, and 75 g flour. That gives you a generous amount of starter to work with by the next morning, with extra left over to go back in the fridge for next time.
- The next morning, place the water, pumpkin, active starter, maple syrup, bread flour, and salt into the bowl of a stand mixer fitted with the dough hook. Mix on medium speed for 5–7 minutes, until everything comes together into a firm, cohesive dough.With the mixer still running, add the softened butter one tablespoon at a time, waiting for each piece to fully disappear into the dough before adding the next. From the start of mixing to the last bit of butter going in, plan on this taking roughly 15–20 minutes total.You’ll know the dough is ready when it’s smooth, glossy, and pulling cleanly off the sides of the bowl to wrap around the hook, rather than sitting in a sticky puddle at the bottom.
- Transfer the dough into a measuring bowl — and pat it down into an even layer. Mark or note where the top of the dough sits right now; you’ll use this as your reference point for tracking the rise.Check the dough’s internal temperature with an instant-read thermometer. If it’s reading above 85°F, pop it in the fridge for about an hour to bring it back down before moving on to stretch and folds.
- Perform two sets of stretch and folds, spaced about 40 minutes apart. After the second set, let the dough continue rising at room temperature until it has increased in volume by roughly 50%.
- Once the dough has risen by about 50%, cover the container and move it to the fridge for a cold ferment of 8 to 24 hours. If you’re short on time and want to skip the cold ferment entirely, that’s completely fine — once the dough hits that 50% rise, go ahead and move straight to shaping.
- Turn the dough out onto a lightly floured surface. Flatten it into a rectangle — a rolling pin makes quick work of this — oriented so the long side runs left to right in front of you. Spray the surface with some water lightly so the seasoning sticks better and the layers don’t separate during baking.Sprinkle a layer of pumpkin spice and raisins evenly over the surface. Fold the left and right edges in toward the center so the resulting width matches the length of your loaf pan, spray with water, then sprinkle another layer of pumpkin spice and raisins over the top. Roll the dough up snugly from the bottom edge, keeping even tension as you go.Place the shaped dough seam-side down into a lined and lightly greased 9×4-inch loaf pan.
- Cover the pan and let the dough proof at room temperature until it has doubled in size.
- Preheat your oven to 375°F. Score the top of the loaf with a few deep slashes, about ½ inch deep.
- Bake for 40–45 minutes, until the internal temperature reads between 198°F and 205°F on a probe or instant-read thermometer inserted into the center of the loaf.
- As soon as the loaf comes out of the oven, lift it from the pan using your parchment handles and brush the top generously with butter.Remove the parchment and cool the loaf completely on a wire rack before slicing.
Notes
Same-Day Hybrid Option: Discard + Instant Yeast
Swap the 125 g active starter at peak for sourdough discard. Add 1/2 tsp instant yeast directly into the flour when you mix the dough in Step 2, then skip Step 1 entirely as well as cold fermentation. If you don’t have 125g of discard, you can use as little as 50g plus 1 tsp instant yeast to make this work. Pro Tip: This hybrid version won’t develop quite the same depth of tang you’d get from an overnight active-starter rise, but you still get real discard flavor plus a fast, reliable rise from the yeast. It’s the version I reach for on a weekend morning when I want warm bread by lunch, not by suppertime.