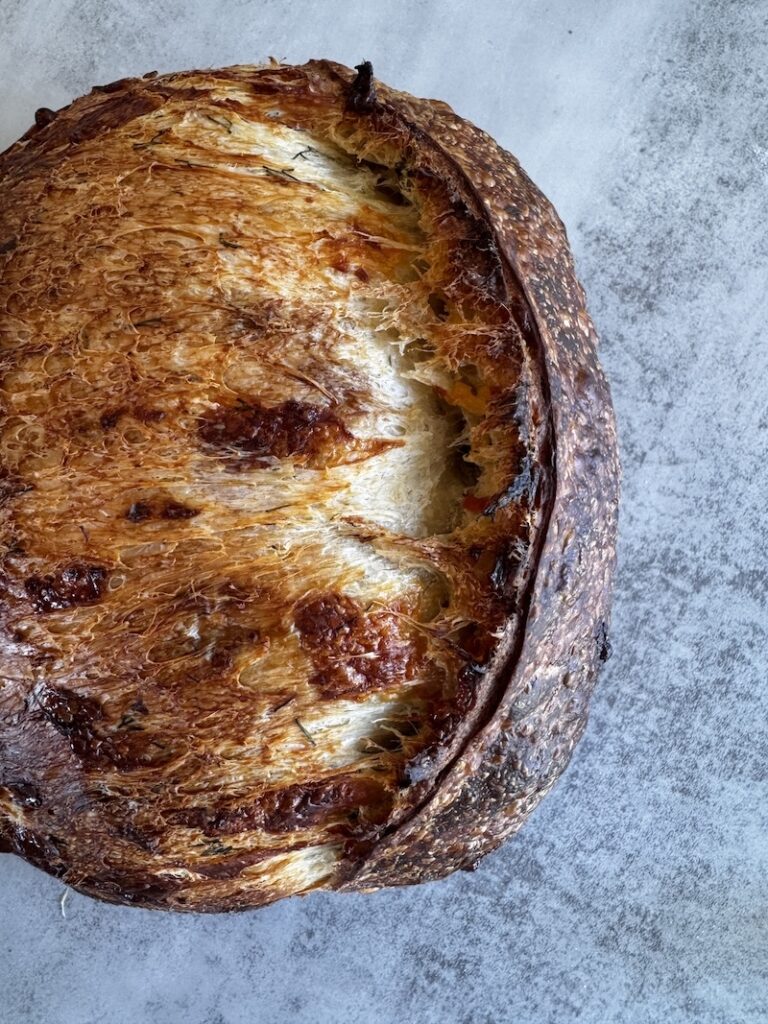
White Cheddar and Fresh Dill Sourdough Loaf
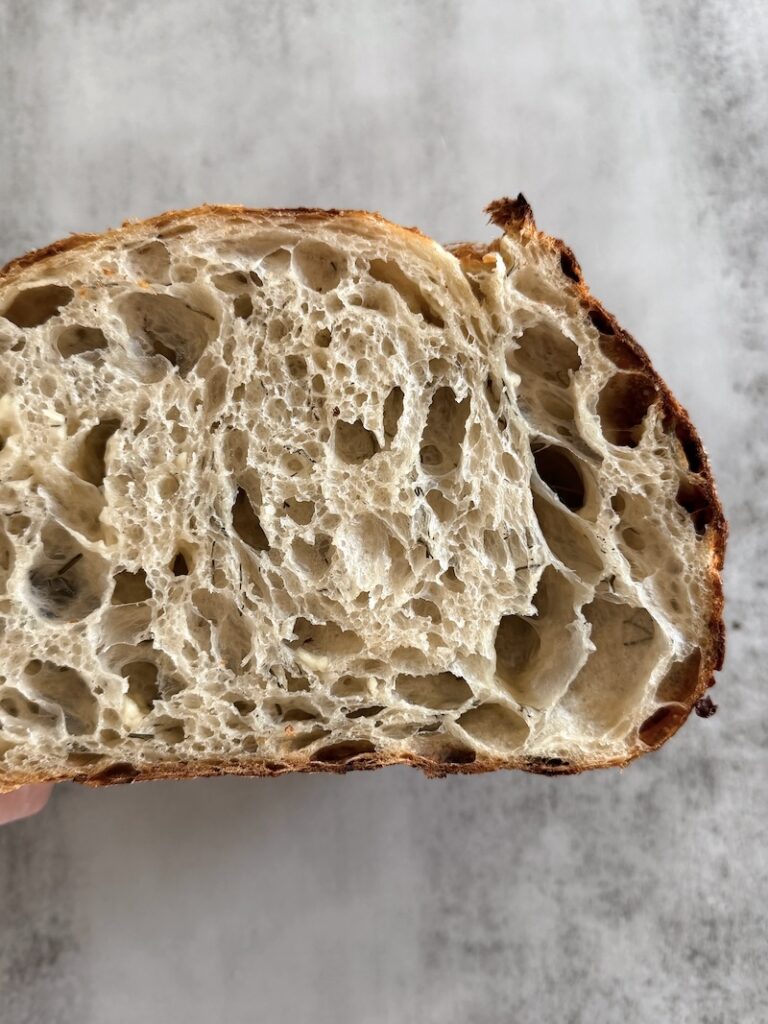
Hey there, fellow home bakers! If you’ve been chasing that perfect sourdough loaf—crispy crust, airy crumb, and flavors that make your taste buds do a happy dance—then buckle up. Today, I’m sharing my White Cheddar and Fresh Dill Sourdough Loaf, a recipe that turns your everyday sourdough into a gourmet masterpiece. Imagine sharp, melty white cheddar paired with bright, fresh dill in every bite.
As your sourdough guide (and self-proclaimed enthusiast who’s baked hundreds of loaves to keep things healthy and delicious), I love this recipe because it proves sourdough isn’t just for plain bread. The natural fermentation makes it easier to digest and packed with gut-loving benefits—perfect for that healthy lifestyle we’re all chasing. Plus, the add-ins? They’re folded right in during lamination for even distribution and that wow-factor crumb. Ready to level up your baking game? Let’s dive in. This one’s beginner-friendly yet impressive enough for weekend brunch or gifting to friends.
Why You’ll Love This White Cheddar Dill Sourdough Loaf
- Flavor explosion: Tangy sourdough meets sharp white cheddar and fragrant dill—think herby, cheesy perfection without overpowering the bread’s natural sour notes.
- Gut-healthy and simple: Long fermentation breaks down gluten and starches for better digestion. No commercial yeast, just your active starter doing the heavy lifting.
- Customizable for your kitchen: Works in any climate— I’ll show you how to watch volume instead of the clock for foolproof results.
- Versatile: Slice it for sandwiches, toast it with eggs, or serve alongside soup. It freezes beautifully too!
- Educational bonus: You’ll master lamination, coil folds, and temperature-aware rising—skills that make every future loaf better.
This loaf uses basic pantry staples and takes about 20 minutes of active work spread over a day (plus hands-off rising and cold proofing). It’s the simplest path to bakery-quality sourdough that supports your healthy eating goals.
Equipment You’ll Need
- Glass measuring batter bowl or a Cambro container (so you can track volume rise)
- Digital Scale
- Bench scraper or spatula
- Spray bottle with water (for lamination)
- Proofing basket or cloth-lined bowl (banneton preferred)
- Dutch oven or baking stone/steel (for open bake)
- Sharp lame or razor blade for scoring
- Parchment paper
- Sharp, serrated knife

Ingredients (Makes One Beautiful Loaf)
- 350g (1 1/2 cup) lukewarm water
- 125g (2/3 cup) active sourdough starter (bubbly and at peak)
- 500g (3 1/2 cup) bread flour (high-protein for that chewy, open crumb; all-purpose works in a pinch but bread flour shines here)
- 10g (1 1/2 tsp) fine sea salt
- ⅓ cup fresh chopped dill (fresh is best for bright aroma—dried won’t cut it)
- 1 cup sharp white cheddar cheese, thick-cut and shredded or cubed into small pieces (the sharper, the better for melty pockets), you can use havarti
Pro tip: Weigh everything for accuracy when mixing your dough—volume measurements can vary, and precision is your friend in sourdough!
Step-by-Step Instructions: From Mix to Golden Loaf
1. Mix the Dough
In your bowl, combine the 350g water and 125g active starter. Stir until mostly dissolved—it’ll look cloudy and happy. Add the 500g bread flour and sprinkle 10g salt on top. Mix everything well for about 2 minutes until evenly combined and no dry flour bits or lumps remain. (I recommend mixing by hand, get to know the temperature and feel of the dough).
Flatten and level the dough in your clear bowl, then note the starting volume (mine hit about 900ml). This is key for tracking rise later—no guessing!
Cover and rest the dough for 1 hour. This short rest hydrates the flour and starts gluten development gently.
2. First Stretch and Fold + Rest
Perform one set of stretch and folds: Wet your hands, reach under the dough, pull up gently, and fold over the center. Rotate the bowl and repeat 4-6 times until the dough starts to resist to being stretched. Cover and rest for 40 minutes.
3. Lamination: The Secret to Even Inclusions and Gorgeous Crumb
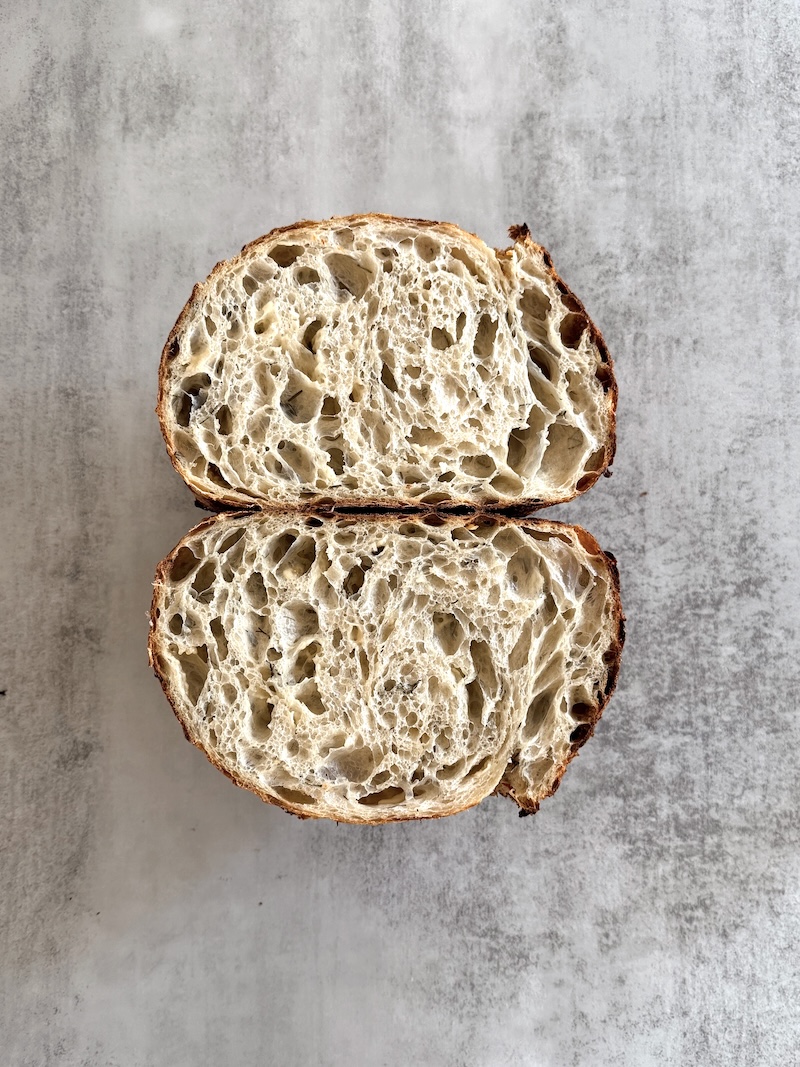
Here’s where the magic partly happens—and why we do it. Lamination gently stretches the dough paper-thin (without tearing too much) to develop a strong, even gluten network. It traps tiny air pockets for a lighter, more open crumb and distributes add-ins like cheese and herbs perfectly so every slice has flavor bombs. No more clumpy pockets or weak spots—it’s like giving your dough a gentle yoga stretch for better structure!
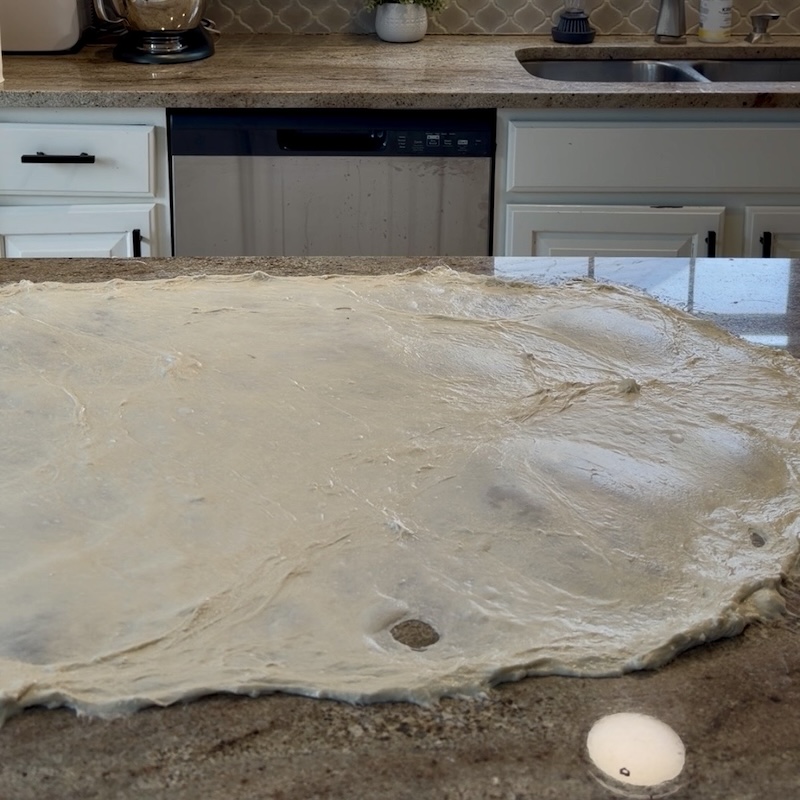
Lightly spray your clean countertop with water (this prevents sticking without adding extra flour). Turn out the dough and gently stretch it in every direction by slipping your fingers under the dough and stretching out gently with your fingertips until it’s thin, but stop before it tears excessively.
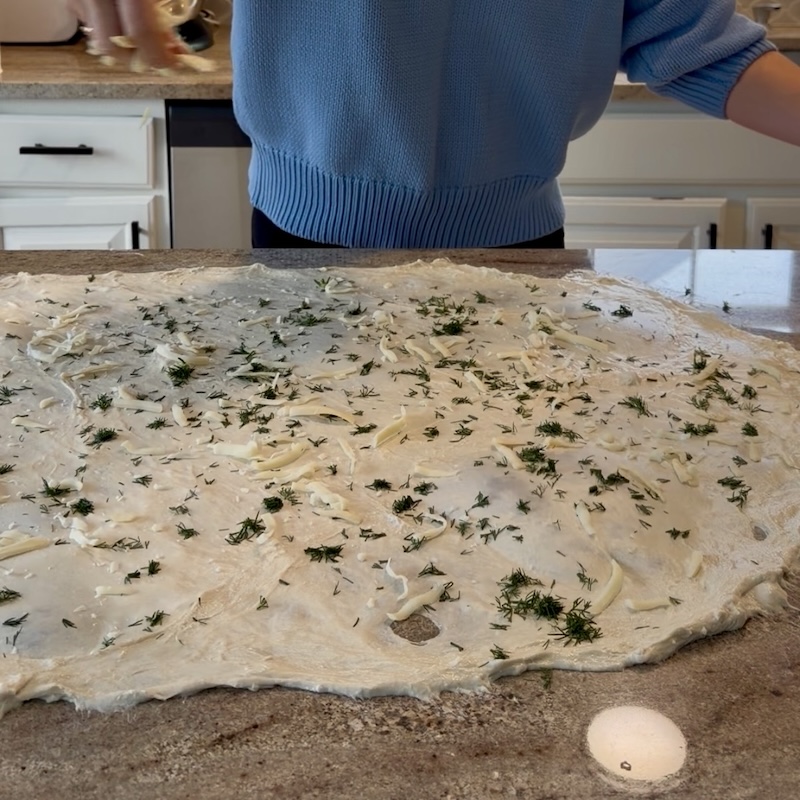
Sprinkle the ⅓ cup chopped fresh dill evenly across the surface, followed by the 1 cup shredded or cubed sharp white cheddar. The cheese will melt into gooey pockets during baking—yum!
Now fold: Bring the left side to the middle, then the right side over it (like a letter). Fold the top down to the middle, then the bottom up. Finally, fold the whole thing into a neat ball and pop it back into your measuring bowl.
4. Coil Folds and Bulk Fermentation
Cover and rest for 40 minutes. Perform a set of coil folds: Wet hands, lift the center of the dough, and let the sides coil under themselves. Rotate and repeat until it forms a smooth ball. Rest another 40 minutes, then do one more set of coil folds.
Now let the dough rise, covered, until it doubles in size (to about 1800ml in my bowl). At 73°F (23°C) in dry conditions.
Temperature and humidity matter—here’s the pro tip: Use your bowl’s volume marks instead of the clock. In tropical, humid, warm climates? Aim for a 75% rise instead of double in size to avoid over-proofing. In cold kitchens, push bulk rise past double in size. This volume method lets you adjust based on your temperature until you find the perfect rise percentage. The percentage rise must be adjusted when seasons change as well.
5. Shaping and Cold Fermentation
Once doubled, gently turn the dough out onto a very lightly floured counter. Pre-shape into a taut round ball using a bench scraper—pull the sides under to build surface tension. Let it rest (bench rest) for 15 minutes.
Now final shape: Flip the dough seam-side up, gently flatten, fold left side to the middle, then right side, roll it up into something of a log. Place seam-side up into a flour-dusted, cloth-lined proofing basket. Rest 10 minutes, then stitch the seams closed if needed.
Cover with plastic wrap or a damp towel and refrigerate for 8-24 hours. I cold-fermented mine for 12 hours—this slow proof develops incredible flavor and makes scoring easier.
6. Prepare for Baking: Scoring the Cold Dough
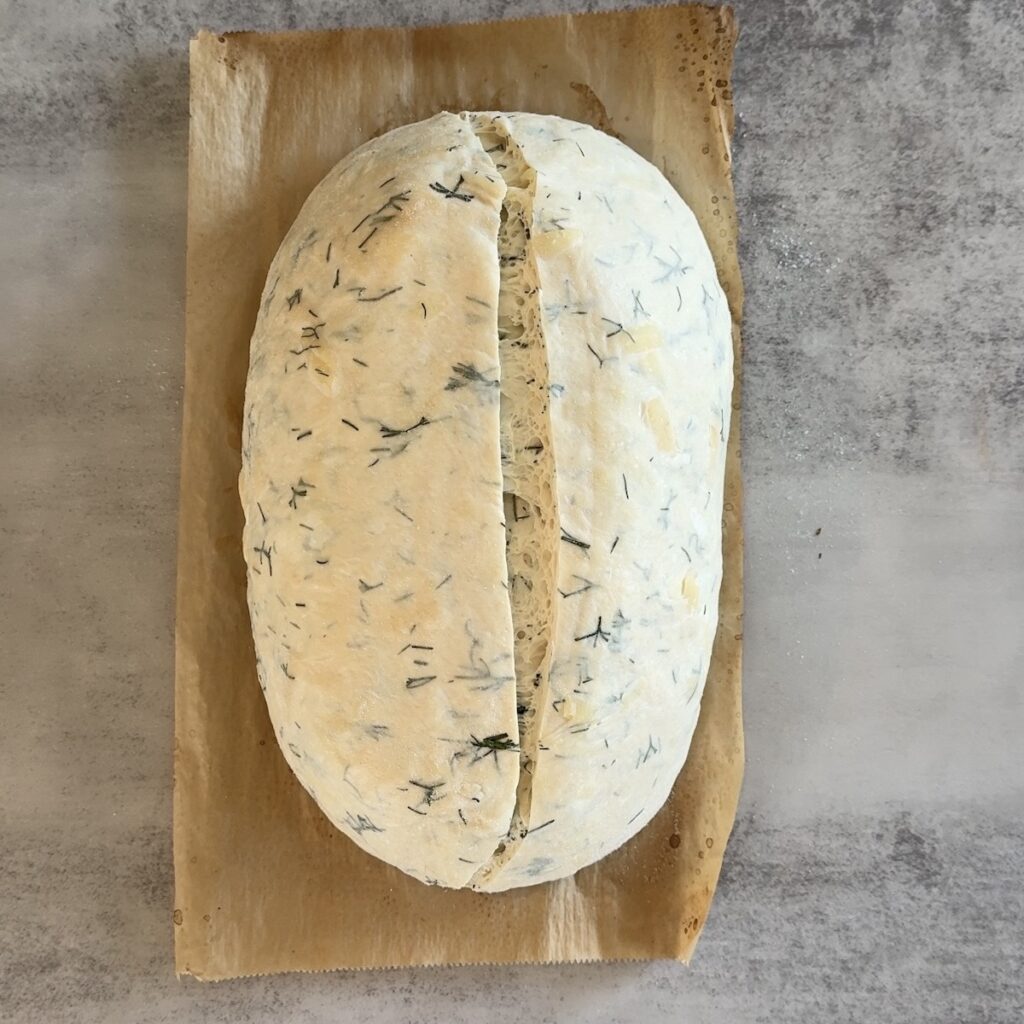
Remove the proofing basket from the refrigerator. Gently turn the dough out onto a piece of parchment paper (seam-side down now).
Using a sharp lame or razor blade, score the top. A simple single slash works beautifully. Scoring allows the bread to expand properly in the oven and creates that signature artisan look.
7. Baking – Two Reliable Methods
Preheat your oven to 450°F (232°C).
Dutch Oven Method: Preheat your Dutch oven for 30–45 minutes. Carefully transfer the scored dough (still on parchment) into the hot pot. Cover and bake 20 minutes. Uncover and bake another 10–15 minutes until deep golden and the internal temperature reaches 198F. Total ≈35 minutes.
Open Baking Method: Preheat a baking stone or steel with a steam pan below. Slide the scored dough (on parchment) onto the stone, add steam (ice cubes or boiling water), and bake about 35 minutes, rotating halfway for even browning.
Cool the loaf on a wire rack for at least 1 hour before slicing — this sets the crumb perfectly.
Serving Ideas, Storage & Baker’s Notes
Toast thick slices for breakfast, use for grilled cheese or deli sandwiches, or serve alongside hearty soups. The cheddar creates lovely melty pockets while the dill keeps things fresh and aromatic.
Storage: Room temperature in a plastic bag for 2 days. Freeze slices for up to 2 months and toast directly from frozen.
Helpful reminders:
- Sticky dough? Wet hands work wonders.
- Cheese trying to escape? Small cubes can help contain it.
- Experimenting? This base welcomes other herbs or cheeses once you’re comfortable.
Baking sourdough is a rewarding journey that brings nourishing, fermented bread to your table. Each loaf teaches you a little more about your starter, your kitchen, and your own rhythm. I hope this White Cheddar and Fresh Dill version brings you joy in the process and pride in the result.
I’d love to hear how your loaf turns out — share your photos, questions, or any tweaks you made in the comments. Happy baking, and here’s to many more beautiful, flavorful loaves on your healthy sourdough adventure!
White Cheddar and Fresh Dill Sourdough Loaf
Ingredients
Method
- In your bowl, combine the 350g water and 125g active starter. Stir until mostly dissolved—it’ll look cloudy and happy. Add the 500g bread flour and sprinkle 10g salt on top. Mix everything well for about 2 minutes until evenly combined and no dry flour bits or lumps remain. (I recommend mixing by hand, get to know the temperature and feel of the dough).
- Flatten and level the dough in your clear bowl, then note the starting volume (mine hit about 900ml). This is key for tracking rise later—no guessing!
- Cover and rest the dough for 1 hour. This short rest hydrates the flour and starts gluten development gently.
- Perform one set of stretch and folds: Wet your hands, reach under the dough, pull up gently, and fold over the center. Rotate the bowl and repeat 4-6 times until the dough starts to resist to being stretched. Cover and rest for 40 minutes.
- Here’s where the magic partly happens—and why we do it. Lamination gently stretches the dough paper-thin (without tearing too much) to develop a strong, even gluten network. It traps tiny air pockets for a lighter, more open crumb and distributes add-ins like cheese and herbs perfectly so every slice has flavor bombs. No more clumpy pockets or weak spots—it’s like giving your dough a gentle yoga stretch for better structure!
- Lightly spray your clean countertop with water (this prevents sticking without adding extra flour). Turn out the dough and gently stretch it in every direction by slipping your fingers under the dough and stretching out gently with your fingertips until it’s thin, but stop before it tears excessively.
- Sprinkle the ⅓ cup chopped fresh dill evenly across the surface, followed by the 1 cup shredded or cubed sharp white cheddar. The cheese will melt into gooey pockets during baking—yum!
- Now fold: Bring the left side to the middle, then the right side over it (like a letter). Fold the top down to the middle, then the bottom up. Finally, fold the whole thing into a neat ball and pop it back into your measuring bowl.
- Cover and rest for 40 minutes. Perform a set of coil folds: Wet hands, lift the center of the dough, and let the sides coil under themselves. Rotate and repeat until it forms a smooth ball. Rest another 40 minutes, then do one more set of coil folds.
- Now let the dough rise, covered, until it doubles in size (to about 1800ml in my bowl). At 73°F (23°C) in dry conditions.
- Temperature and humidity matter—here’s the pro tip: Use your bowl’s volume marks instead of the clock. In tropical, humid, warm climates? Aim for a 75% rise instead of double in size to avoid over-proofing. In cold kitchens, push bulk rise past double in size. This volume method lets you adjust based on your temperature until you find the perfect rise percentage. The percentage rise must be adjusted when seasons change as well.
- Once doubled, gently turn the dough out onto a very lightly floured counter. Pre-shape into a taut round ball using a bench scraper—pull the sides under to build surface tension. Let it rest (bench rest) for 15 minutes.
- Now final shape: Flip the dough seam-side up, gently flatten, fold left side to the middle, then right side, roll it up into something of a log. Place seam-side up into a flour-dusted, cloth-lined proofing basket. Rest 10 minutes, then stitch the seams closed if needed.
- Cover with plastic wrap or a damp towel and refrigerate for 8-24 hours. I cold-fermented mine for 12 hours—this slow proof develops incredible flavor and makes scoring easier.
- Remove the proofing basket from the refrigerator. Gently turn the dough out onto a piece of parchment paper (seam-side down now).
- Using a sharp lame or razor blade, score the top. A simple single slash works beautifully. Scoring allows the bread to expand properly in the oven and creates that signature artisan look.
- Preheat your oven to 450°F (232°C).
- Preheat your Dutch oven for 30–45 minutes. Carefully transfer the scored dough (still on parchment) into the hot pot. Cover and bake 20 minutes. Uncover and bake another 10–15 minutes until deep golden and the internal temperature reaches 198F. Total ≈35 minutes.
- Preheat a baking stone or steel with a steam pan below. Slide the scored dough (on parchment) onto the stone, add steam (ice cubes or boiling water), and bake about 35 minutes, rotating halfway for even browning.
- Cool the loaf on a wire rack for at least 1 hour before slicing — this sets the crumb perfectly.