Ultimate Soft Sourdough Hamburger Buns Recipe
I’ll be honest with you: the first time I tried to make sourdough hamburger buns, I treated them exactly like my regular sourdough loaf — same starter, same hydration, same hands-off attitude. I ended up with something closer to a dense little roll than a bun. It held a burger together, technically. But it didn’t want to be eaten — it tasted more like an afterthought than the star of the plate.
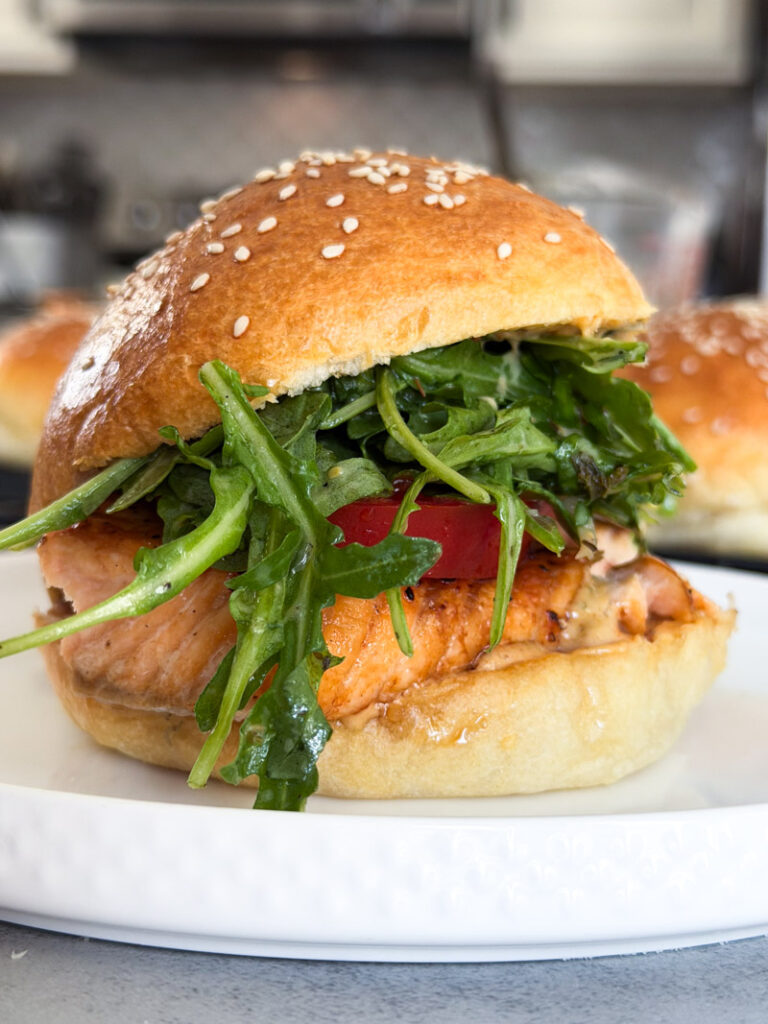
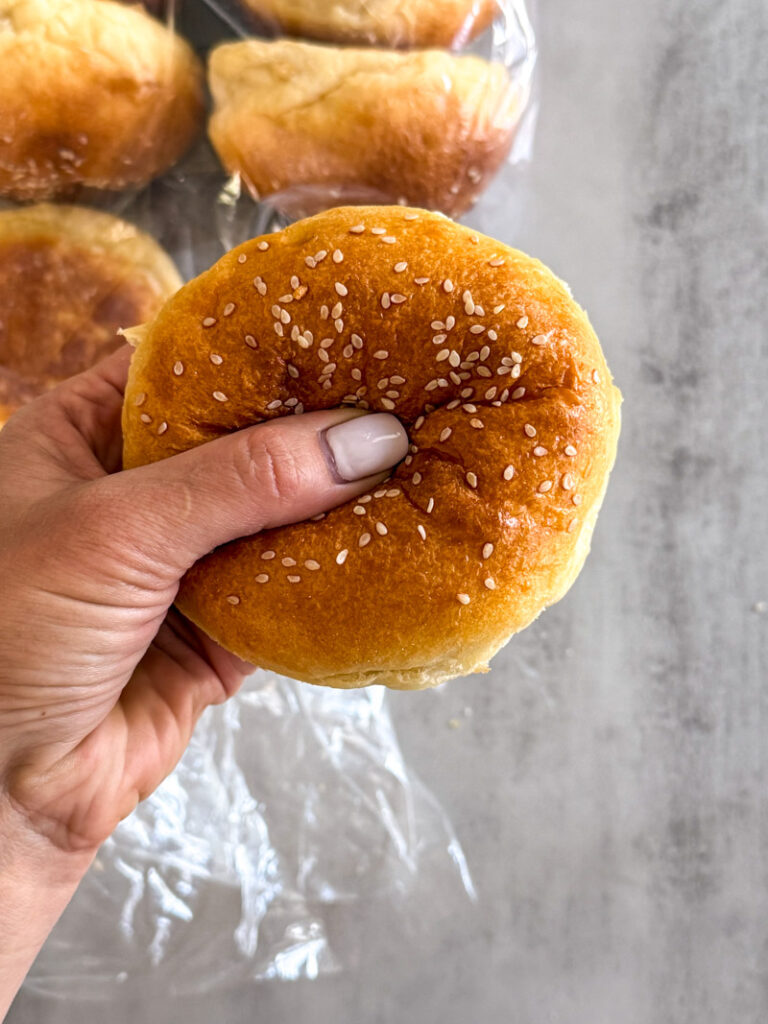
That’s when I went down the rabbit hole of Japanese milk bread techniques, and I haven’t looked back since. These sourdough hamburger buns are the result: pillowy, faintly sweet, and golden on top. They’re sturdy enough to hold every drippy, saucy burger topping without falling apart by the second bite. My family has fully banned store-bought buns from our cookouts now, and honestly, I don’t think they’re being dramatic about it.
What makes these different from most sourdough hamburger buns online? Two techniques: a yudane (a scalded flour paste) and a sweet stiff starter. Neither one is complicated, but together they completely change the texture and flavor of the final bun — softer, less sour, and noticeably better at staying fresh past day one. If you’ve ever bitten into a sourdough bun that tasted more like sandwich bread than a proper burger bun, this recipe is going to feel like a revelation.
What Are These Sourdough Hamburger Buns?
These are enriched, naturally leavened hamburger buns built on two supporting techniques that aren’t part of a typical sourdough loaf: a yudane (a hot-water flour scald) and a sweet stiff starter (a low-hydration, sugar-fed starter build). The dough itself is rich — milk, butter, egg, a touch of sugar — which is what gives hamburger buns their soft, tender crumb instead of the chewy, open crumb you’d want in an artisan loaf. But it’s the yudane and the sweet stiff starter doing the real heavy lifting here, and I want to slow down and explain both, because understanding the “why” is what will make you a better baker, not just a better recipe-follower.
What is Yudane?
Pronounced yoo-DAH-nay, is a Japanese bread-making technique where you pour boiling water over a portion of your flour and stir it into a thick paste. That sudden blast of heat gelatinizes the starches in the flour — meaning the starch granules absorb the water and swell, locking in moisture in a way raw flour simply can’t. When that gelatinized paste gets folded into the rest of your dough once cooled, it acts like a built-in moisture reservoir. The result is a crumb that’s noticeably softer, more tender, and slower to dry out than a standard enriched dough. This is the same family of technique as tangzhong (which you may have seen in milk bread recipes), but yudane uses boiling water straight from the kettle instead of a cooked roux, which makes it slightly faster, easier, and just as effective for hamburger buns.
Sweet Stiff Sourdough Starter
A small, separate starter build — not your everyday maintenance starter — made specifically for enriched doughs like this one. You take a small amount of your active starter and feed it a low-hydration ratio of flour and water (much stiffer than a typical 100% hydration starter) along with a bit of sugar. This combination does two things: the lower hydration produces less of the acetic acid that gives sourdough its sharp tang, and the added sugar feeds the wild yeast while also buffering the acidity even further. The result is a starter that still gives you all the natural leavening power and gut-friendly fermentation benefits of sourdough, but with a much milder, rounder flavor that doesn’t compete with butter, milk, and sesame seeds the way a fully sour starter would. For lean, crusty sourdough bread, a tangy starter is a feature. For a hamburger bun that’s supposed to taste soft and a little sweet, that same tang can fight against everything else you’re trying to build — which is exactly why bakers who specialize in enriched sourdough (milk bread, brioche, sweet rolls) almost always reach for a sweet stiff starter instead of their everyday starter.
Why You’ll Love This Recipe
- Genuinely soft, bakery-style texture — the yudane keeps the crumb tender for days, not just the first afternoon.
- Mellow flavor, not sour — the sweet stiff starter gives you all the benefits of natural fermentation with almost none of the tang, so the bun tastes like a bun, not like a loaf in disguise.
- Naturally leavened, no commercial yeast needed — you get the gut-friendly fermentation benefits of sourdough in a format your whole family will actually ask for.
- Sturdy enough for a loaded burger — these hold their shape and structure through every sloppy topping without going soggy or falling apart.
- A genuinely useful new skill — once you understand yudane and sweet stiff starters, you can apply both to milk bread, cinnamon rolls, brioche, and any other enriched sourdough bake.
- Flexible for a real schedule — both the yudane and the sweet stiff starter are made the night before, so the actual “baking day” moves quickly.
Ingredient Breakdown
I’ve broken this recipe into three components — the yudane, the sweet stiff starter, and the final dough — because each one is built separately before coming together. Both gram weights and approximate volume measurements are listed below, but I always recommend weighing your ingredients on a digital kitchen scale for the most consistent buns.
For the Yudane
- 80g (⅔ cup) bread flour or all-purpose flour — this is the flour that gets scalded. Any reasonably high-protein flour works here; you’re not building gluten in this step, you’re gelatinizing starch.
- 80g (⅓ cup) boiling water — straight off the kettle. The water needs to be properly boiling, not just hot, in order to fully gelatinize the starch.
For the Sweet Stiff Starter
- 35g (about 2 Tbsp) active sourdough starter — use your starter that has been recently fed and peaked (within a week). A sluggish or underfed starter will struggle to leaven this stiff, low-hydration build.
- 100g (¾ cup + 1 Tbsp) bread flour or all-purpose flour
- 45g (3 Tbsp) water, warm
- 15g (1 Tbsp + 1 tsp) granulated sugar — this feeds the wild yeast and helps tame the acidity of the finished starter. Don’t be tempted to skip it; it’s doing real work, not just adding sweetness.
For the Dough
- All of the yudane (above)
- All of the sweet stiff starter (above)
- 185g (¾ cup + 1 Tbsp) cold Half & Half (whole milk can be used instead) — keeping this ingredient cold is what matters most. A stand mixer generates real friction heat as it kneads, and if your liquid starts out cold, it helps offset that warming so your dough doesn’t overheat and start fermenting too fast before you’ve even finished mixing. Half & Half also adds an extra layer of softness and richness to the crumb thanks to its higher fat content; whole milk will still give you a great bun, just very slightly less rich.
- 20g (1 Tbsp + 2 tsp) granulated sugar — for flavor and to help the crust brown beautifully.
- 8g (about 1⅓ tsp) fine sea salt or table salt
- 1 large egg, room temperature — adds richness, structure, and a lovely golden color to the crumb.
- 165g (1⅓ cup + 1 Tbsp) bread flour or all-purpose flour — bread flour gives slightly more chew and structure; all-purpose flour gives a softer, more tender bun. Either is a valid choice here.
- 50g (3½ Tbsp) unsalted butter, softened — added after initial gluten development for a smooth, glossy, enriched dough.
- Sesame seeds, for topping (optional, but I think a burger bun without them is missing something)
- Egg wash (1 egg beaten with a splash of water or milk), for that deep golden shine
Sourdough Tools You’ll Want
- Digital kitchen scale — accuracy matters even more in enriched doughs like this one, where the dough is soft and easy to over- or under-hydrate.
- Stand mixer with dough hook — this is a sticky, enriched dough, and a stand mixer will save your forearms. It can be done by hand, but plan on a lot more time and patience.
- Instant-read or probe thermometer — useful for checking your boiling water for the yudane and confirming the buns are fully baked.
- Bench scraper — makes dividing this soft, slightly sticky dough into even portions far easier.
- Half sheet pan (with lid) — for proofing covered and baking the shaped buns.
Step-by-Step Directions
Step 1: Make the Yudane (The Night Before)
Bring 80g of water to a full, rolling boil. Pour it directly over 80g of flour in a small bowl and stir quickly with a spoon or spatula until no dry flour remains and you have a smooth, slightly glossy, thick paste. Let it cool for a few minutes, then cover and refrigerate overnight.
⚠️ Watch Out: Don’t rush this step by using hot-but-not-boiling water. The starch in the flour needs that full boiling temperature to properly gelatinize. If your water has cooled even slightly off the boil, you won’t get the same soft, moisture-retaining texture in your finished buns.
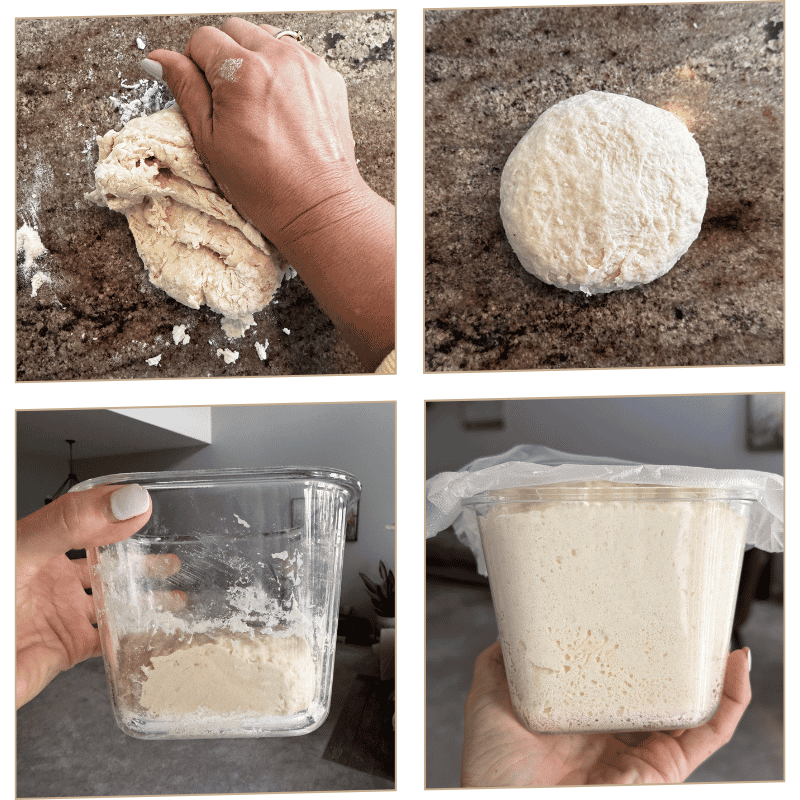
Step 2: Build the Sweet Stiff Starter (The Night Before)
In a small bowl or jar, combine 35g of active starter, 100g of flour, 45g of water, and 15g of sugar. Mix/knead until you have a stiff, somewhat dry dough — it will look more like a dense little dough ball than a typical bubbly starter. Cover loosely and let it sit at room temperature overnight, until it has roughly tripled in size, developed a rounded, domed top, and smells sweet and faintly fruity rather than sharply sour.
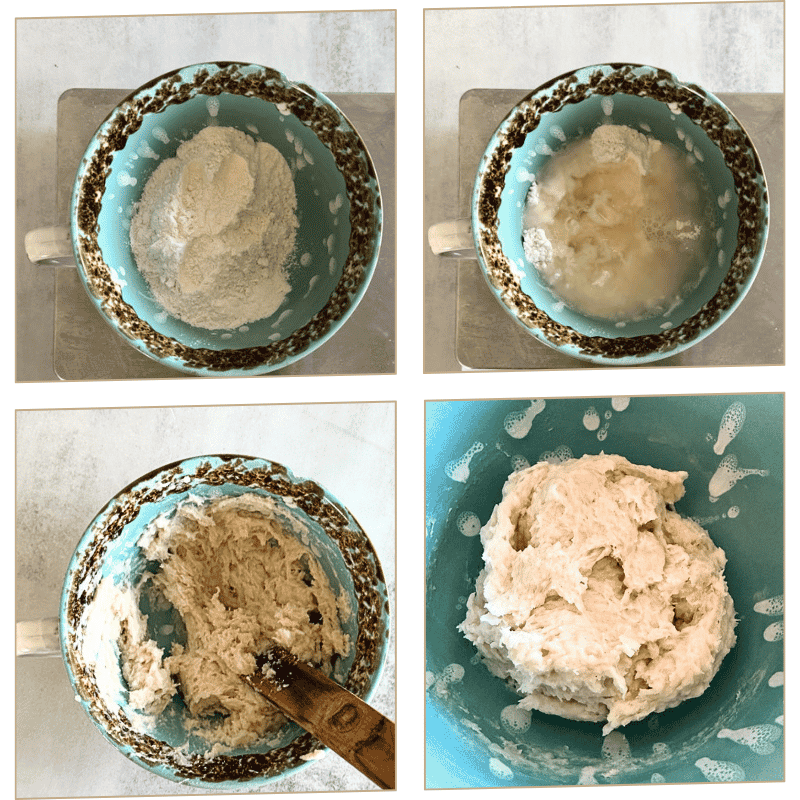
Step 3: Mix the Dough (Next morning)
The next morning, combine the cold Half & Half, all of the yudane, all of the sweet stiff starter, sugar, salt, egg, and flour in the bowl of a stand mixer fitted with the paddle attachment. Mix on low speed for 1–2 minutes, just until everything is roughly combined and there are no dry pockets of flour — this short paddle mix helps break up the stiff starter so it doesn’t get stuck against the bottom of the bowl once you switch to the dough hook.
Switch to the dough hook and knead on low-medium speed for 5-8 minutes, until the dough comes together into a smooth, elastic mass that pulls cleanly away from the sides of the bowl (it may still stick slightly to the bottom — that’s fine). Add the softened butter in two or three additions, letting each addition fully incorporate before adding the next. Continue kneading for another 6–8 minutes, until the dough is smooth, glossy, and passes a rough windowpane test — stretch a small piece thin enough to see light through it without it tearing immediately.
💡 Pro Tip: This dough will feel quite soft and slightly tacky even when fully kneaded — that’s the nature of an enriched, buttery dough. Resist the urge to add extra flour to compensate; a soft dough is exactly what gives you that pillowy bun texture.
Step 4: Bulk Ferment
Transfer the dough to a lightly greased bowl, cover, and let it rise at room temperature. This is where I want you to set the clock aside and watch the dough instead. Look for a 75–80% increase in volume rather than a full doubling — enriched doughs with butter, sugar, and egg tend to ferment a little differently than a lean dough, and pushing all the way to double can leave you with a slack, overproofed bun. Depending on your kitchen’s temperature, this typically takes 3–5 hours, but a warm kitchen can speed that up considerably and a cool kitchen will slow it down. The dough should look puffy, feel soft and a little jiggly when nudged, and show a few small bubbles near the surface.
⚠️ Watch Out: This is the single most common mistake I see in enriched sourdough baking — following a recipe’s stated bulk fermentation time to the letter instead of reading your dough. Your kitchen is not my kitchen, and your starter’s strength is not my starter’s strength. Watch the rise, not the wall clock.
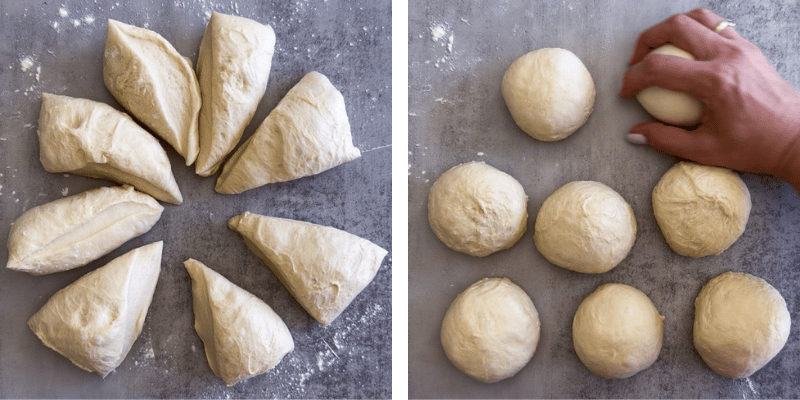
Step 5: Divide and Shape
Turn the dough out onto a lightly floured surface and divide it into 6 equal pieces (roughly 138g each) using a bench scraper and your scale. Shape each piece into a tight, smooth ball by cupping your hand around the dough and dragging it in small circles against the counter until the surface is taut and smooth, with the seam tucked underneath. Place the shaped buns onto a parchment-lined half sheet pan, spacing them a few inches apart to allow for spread.
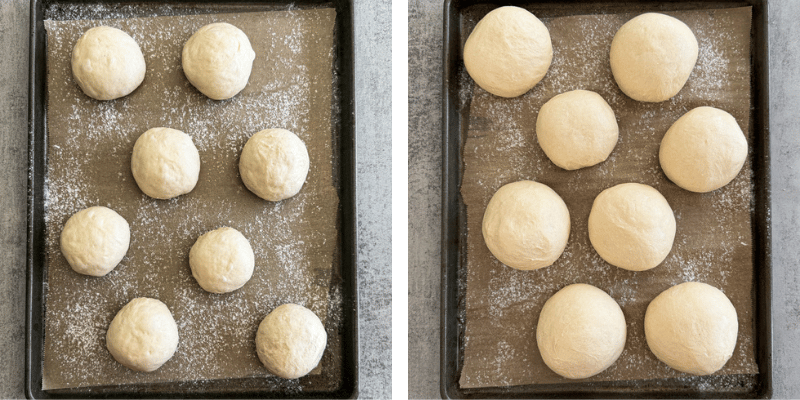
Step 6: Final Proof
Cover the shaped buns loosely with a reusable cover or plastic wrap and let them proof at room temperature. Again, watch the dough rather than the clock: you’re looking for the buns to look noticeably puffy, feel soft and pillowy to a gentle touch, and spring back slowly rather than snapping back instantly. This usually takes 2–4 hours depending on your kitchen’s temperature and the strength of your starter.
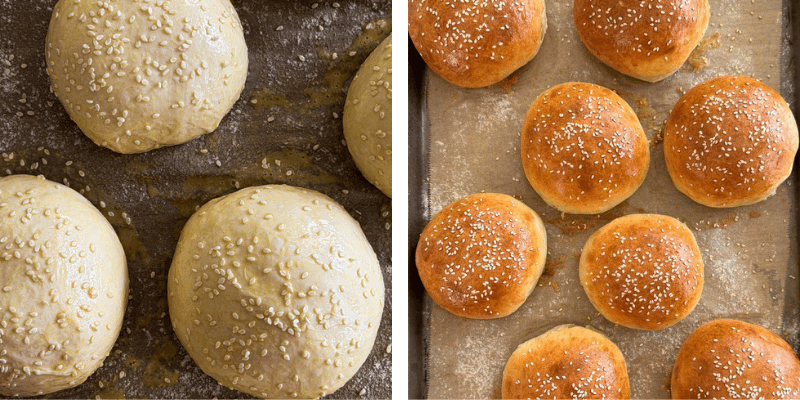
Step 7: Top and Bake
Preheat your oven to 375°F (190°C). Brush each bun gently with egg wash, taking care not to deflate them, and sprinkle generously with sesame seeds. Bake for 18–22 minutes, until the buns are deeply golden brown on top and register at least 190°F (88°C) in the center.
💡 Pro Tip: You don’t need any special equipment for this bake — no Dutch oven, no baking stone, no steam required. Hamburger buns, unlike a lean artisan loaf, bake perfectly well directly on a regular sheet pan in a standard home oven. The whole “you need fancy gear to bake sourdough” myth simply doesn’t apply to enriched bakes like this one.
Step 8: Cool
Transfer the buns to a wire rack and let them cool completely, at least 30–40 minutes, before slicing. I know the smell coming from your kitchen at this point is borderline unbearable, but cutting into them too soon will give you a slightly gummy crumb since the starches are still setting.

How to Store & Freeze
Room Temperature: Once fully cooled, store the buns in an airtight bag or container at room temperature for up to 3 days. Thanks to the yudane, they’ll stay noticeably softer for longer than a standard sourdough bun.
Refrigerator: I don’t recommend refrigerating these buns once baked — the fridge tends to dry out and toughen enriched breads faster than room temperature storage, even in an airtight bag. If you need them to last longer than 3 days, freezing is the better option.
Freezer: Let the buns cool completely, then place them in a freezer-safe bag or container, ideally with a piece of parchment between each bun if you’re stacking them. Freeze for up to 3 months. To thaw, leave them at room temperature for an hour or two, or microwave in short bursts wrapped in a damp paper towel. To re-crisp the exterior, give them a few minutes in a 300°F (150°C) oven, sliced side up.
Troubleshooting
Problem: My buns turned out dense instead of soft and pillowy. Why it happened: This is almost always under-proofing — either the bulk ferment or the final proof was cut short, often because a recipe’s stated time was followed instead of the dough’s actual appearance. How to fix it: Let the dough rise until it truly looks puffy, soft, and jiggly at each stage, even if that takes longer than expected. A warmer spot in your kitchen (inside a turned-off oven with the light on, for example) can help speed things along on a cool day.
Problem: My sweet stiff starter didn’t triple overnight. Why it happened: Likely the seed starter wasn’t at full peak activity when you built it, or your kitchen ran cooler than expected overnight. How to fix it: Always feed your liquid starter and use it right at peak — doubled, domed, and bubbly — before building your sweet stiff starter. If your kitchen runs cool, give the stiff starter extra time rather than rushing it into the dough underdeveloped.
Problem: The buns tasted more sour than I expected. Why it happened: This usually means the sweet stiff starter was used past its peak, after it had already started to deflate, which allows acidity to build back up. How to fix it: Use the sweet stiff starter right when it hits peak — tripled and domed, before it starts to collapse. If it consistently overferments before you’re ready to use it, build it with a slightly cooler water temperature or move it to a cooler spot.
Problem: My buns spread flat instead of holding a nice round shape. Why it happened: This points to either an overproofed final rise or a shaping step that didn’t create enough surface tension on the dough ball. How to fix it: When shaping, make sure you’re dragging the dough firmly enough against the counter to create a smooth, taut skin. And keep a close eye on the final proof — pull the trigger on baking as soon as the buns look properly puffy rather than letting them go further “just to be safe.”
Problem: The tops cracked or split during baking. Why it happened: Usually under-proofing at the final stage, or a dough surface that dried out slightly during the proof. How to fix it: Make sure your proofing cover is snug enough to prevent a dry skin from forming, and confirm the buns are fully, visibly puffy before they go into the oven.
Frequently Asked Questions
Can I use sourdough discard instead of a sweet stiff starter? Not for this recipe as written. Discard alone doesn’t have the leavening power to rise this enriched dough on its own, and the whole point of the sweet stiff starter is the specific low-hydration, sugar-fed build that mellows the flavor. If you only have discard on hand, you’ll need to refresh it to an active, peak starter first and then build the sweet stiff starter from that.
What’s the difference between yudane and tangzhong? Both gelatinize starch to soften bread, but yudane is made by pouring boiling water directly over flour, while tangzhong is a roux of flour and liquid cooked on the stovetop to a specific temperature. Yudane is faster and just as effective for a recipe like this one.
Can I skip the yudane step? You can, but you’ll lose a meaningful amount of softness and shelf life. If you’re short on time, the dough will still rise and bake into a workable bun, just slightly less tender and quicker to dry out.
Why is my dough so sticky compared to my regular sourdough bread dough? Enriched doughs with butter, egg, and milk are naturally softer and tackier than a lean artisan dough, especially once the butter is fully incorporated. This is expected — resist adding extra flour, which will make your buns denser rather than fixing the stickiness.
Can I make these into hot dog buns instead? Yes. Divide the dough the same way, but shape each piece into a log instead of a ball, and arrange them with the sides touching on the sheet pan if you want that classic pull-apart look.
How far in advance can I prep this recipe? The yudane and sweet stiff starter are both made the night before baking day, which is the most efficient way to work this recipe into a normal schedule. The shaped, unbaked buns can also be proofed about halfway, then refrigerated overnight and finished proofing the next morning before baking, if you’d like to spread the process across two days.
If you give these sourdough hamburger buns a try, I’d love to hear how they turn out for you — and if this is your first time working with a sweet stiff starter, welcome to one of my favorite corners of enriched sourdough baking.