Ingredients
Method
Step-by-Step Directions
Day 1: Build the Sweet Stiff Starter
- Several hours before you plan to mix your dough, combine the starter, water, sugar, and flour in a small bowl until you have a stiff, cohesive mass — it will feel more like a dense dough than a typical loose starter. Cover it and let it sit at room temperature until it's visibly domed and just beginning to show cracks on top, usually 4–6 hours depending on your kitchen's temperature.
Step 1: Mix the Dough
- Into the bowl of a stand mixer fitted with a dough hook, add all of your wet ingredients (cold water, ice, malt syrup) first, then layer your dry ingredients on top (flour, sugar, salt) followed by your sweet stiff starter and diastatic malt powder.
- Mix on speed 1 (about 25–30% on an Ooni-style mixer) until a shaggy, rough mass forms — this takes about 2 minutes. Increase to speed 2 (about 45–50%) and mix for another 10–15 minutes.
- This is a genuinely long mix, and that's intentional. You're looking for a dough that's smooth and at or near windowpane — meaning you can stretch a small piece thin enough to see light through it without it tearing immediately. Bagel dough is stiff, so don't be alarmed if it looks tighter and less pliable than a typical sourdough loaf dough. That stiffness is exactly what gives you the chew.
- ⚠️ Watch Out: If your mixer starts to feel too warm to the touch, stop. Turn it off, let the dough rest for about 15 minutes, and then resume mixing. A dough that gets too warm during this long mix will ferment unevenly and can affect your final texture.
Step 2: Check the Dough Temperature
- Transfer the dough to a lightly oiled glass measuring bowl or straight-sided container. Press it flat on top and note the level — this is how you'll track its rise later without guessing. Check the dough's temperature. If it's reading 85°F or warmer, pop the bowl into the fridge for about an hour to bring it back down before moving on. A dough that starts too warm will ferment too fast and lose the flavor development this recipe is built around.
Step 3: Strengthen and Bulk Rise
- After the dough rests for an hour, perform a set of stretch and folds directly in the bowl — this builds additional strength without adding more mix time. Then let the dough rise at room temperature on the counter.
- 💡 Pro Tip: This is where I want you to unlearn the habit of watching the clock. Because this is a stiff, low-hydration dough, you're not looking for it to double — you're watching for it to rise no more than 50% in volume. This is the same percentage-rise method I teach for every sourdough recipe, just calibrated differently for this stiffer dough: the visual cue matters far more than the number of minutes on a timer. Room temperature, starter strength, and even the season will all change how long this takes, so trust the mark you made in Step 2, not a stopwatch.
Step 4: Divide and Pre-shape
- Turn the dough out onto your counter and divide it into 8 pieces, roughly 125–130g each. A kitchen scale will save you a lot of guessing here and help your bagels bake evenly.
- Pre-shape each piece into a tight, round ball. Cover them with plastic wrap, or place them on a half sheet pan under a lid, so they don't dry out while you work through the rest. Let them rest for 30 minutes before shaping — this relaxes the gluten you just built and makes shaping the actual bagel shape much easier.
Step 5: Shape Your Bagels
- Working with one piece at a time and keeping the rest covered, shape each ball into a bagel. My preferred method: flatten the dough slightly, roll it into a small rectangle, then roll that rectangle into a rope about 14 inches long. Wrap the rope around your hand so the ends overlap by a couple of inches, and roll the overlapped seam against your countertop to pinch it firmly closed.
- Place each shaped bagel on its own square of parchment paper that's been lightly sprayed with oil. Once all 8 are shaped, cover the pan and let them rest at room temperature for 2 hours.
Step 6: The Cold Ferment
- Transfer the pan to the refrigerator and let the bagels cold ferment for 24–36 hours. This long, slow, cold rise is where most of the flavor in a New York bagel actually develops — it's not a step to rush or shorten.
Day 2: Boil and Bake
Step 7: Check for Proof
- Pull your bagels from the fridge and take a good look at them before doing anything else. You're looking for bagels that appear noticeably airy and puffed — roughly 50% larger than when they went into the fridge. If they look that way, you're ready to move straight to boiling.
- If they still look tight and dense, that's not a failure — it just means they need more time. Let them sit out, covered, at room temperature for 2–4 hours to finish proofing before you boil.
Step 8: Preheat and Set Up Your Oven
- Preheat your oven to 500°F, ideally for a full hour, with two racks set up inside. Place a cast iron pan or other metal pan on the bottom rack — this is where you'll create steam later, and it needs to be fully preheated to do its job.
Step 9: Prepare the Boiling Water
- Fill a 6–8 quart pot about halfway with water — choose a pot large enough to comfortably hold 2–4 bagels at once without crowding them. Stir in 2–3 Tbsp of barley malt syrup until it dissolves. If you can't find barley malt syrup, substitute 1½–2 Tbsp brown sugar plus 2 Tbsp molasses.
- Bring the water to a full rolling boil. You'll notice the color deepen significantly as the malt dissolves and the water heats. Keep an eye on it — if it starts foaming excessively, reduce the heat slightly or add a small drop of oil to break the surface tension. Once it's at a full rolling boil, reduce the heat to a gentle simmer.
Step 10: Boil the Bagels
- Transfer your bagels to the water top-down, parchment paper and all. Use tongs to gently bob the parchment up and down until it releases, then discard the paper. Boil each bagel for 30 seconds per side, then remove with a slotted spoon and set on a wire rack to drain any excess water.
Step 11: Top and Bake
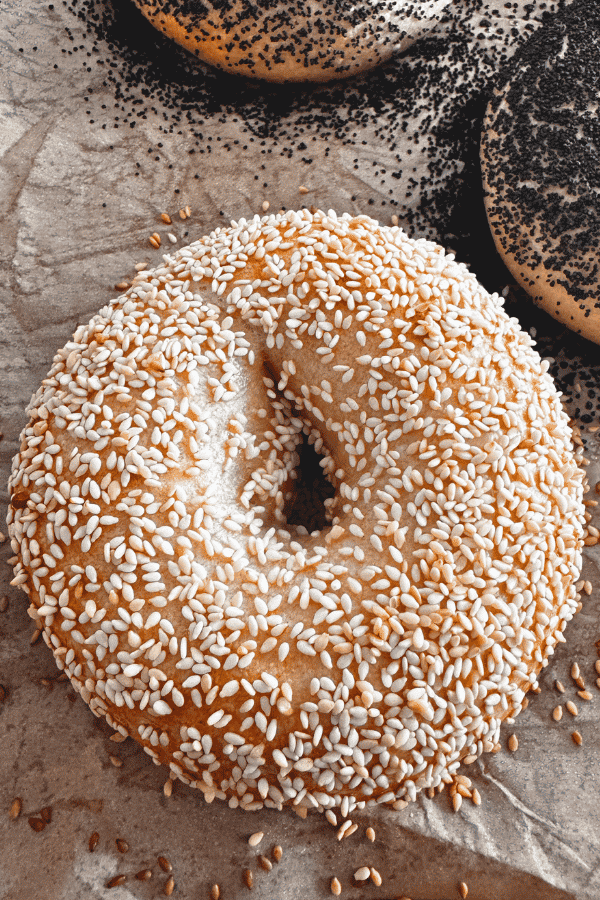
- Brush each bagel with egg wash, then dip it upside down into your topping of choice, or sprinkle toppings over the top. Transfer the bagels to a baking tray lined with parchment and lightly greased with oil spray.
- Place the tray on the top rack of your preheated oven. Add 2 cups of boiling water to the pan on the bottom rack to create a burst of steam. Bake for 10 minutes at 500°F, then remove the steam tray, rotate your baking sheet, and lower the oven temperature to 450°F. Continue baking for another 5 minutes, checking your toppings — if they're browning too quickly, tent the bagels loosely with foil and bake for a final 5 minutes.
- Remove the bagels from the oven and transfer them immediately to a cooling rack. You can dig in warm, or let them cool completely — both are correct.